HP Color LaserJet CM4730 HP Color LaserJet CM4730 MFP - Software Technical Ref - Page 177
Using job-storage features when printing, Releasing a job-storage print job
 |
View all HP Color LaserJet CM4730 manuals
Add to My Manuals
Save this manual to your list of manuals |
Page 177 highlights
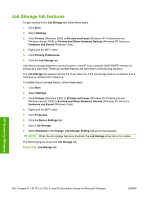
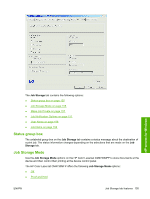
If Job Name Exists. When storing a print job, create a print-job name or allow the MFP software to assign one automatically. If a print job that has the same name already exists, the new print job overwrites the existing print job. To eliminate the chances of a new print job overwriting an old print job because both have the same name, select Use Job Name + (1-99). When the print-job name exists, the MFP software assigns a number between 1 and 99 to the end of the print job name to make it unique. Select Replace Existing File to always have the MFP software overwrite an existing print job that has the same print job name. Using job-storage features when printing Clicking the print icon in the software program toolbar prints the job without using job-storage features. To use job-storage features when printing, follow these steps: 1. Click File and then click Print from the software program. The Print dialog box appears. 2. Click Properties. The document Properties dialog box appears. 3. Click the Job Storage tab. 4. Select the job-storage options by clicking the appropriate option button, and then complete any required fields. 5. Click OK. Topics: ● Releasing a job-storage print job ● Deleting a job-storage print job Releasing a job-storage print job After sending a print job that uses the job-storage feature, release the job to print from the device control panel. 1. Touch Job Storage. 2. In the Retrieve tab, touch the appropriate folder on the left of the screen. The folder that contains the stored jobs opens. 3. Touch the appropriate job. If a PIN is set for the stored job, type the correct PIN. After the PIN is confirmed, the job is unlocked. 4. To print job, press the Select button. Deleting a job-storage print job Sometimes it is necessary to delete a print job from the device memory. Do this from the device control panel. 1. Touch Job Storage. 2. Touch the appropriate folder on the left of the screen. 3. Touch appropriate document. If a PIN is set for the stored job, type the correct PIN. Once PIN is confirmed, the job is unlocked. HP drivers for Windows ENWW Job Storage tab features 159
-
 1
1 -
2
-
3
-
4
-
5
-
6
-
7
-
8
-
9
-
10
-
11
-
12
-
13
-
14
-
15
-
16
-
17
-
18
-
19
-
20
-
21
-
22
-
23
-
24
-
25
-
26
-
27
-
28
-
29
-
30
-
31
-
32
-
33
-
34
-
35
-
36
-
37
-
38
-
39
-
40
-
41
-
42
-
43
-
44
-
45
-
46
-
47
-
48
-
49
-
50
-
51
-
52
-
53
-
54
-
55
-
56
-
57
-
58
-
59
-
60
-
61
-
62
-
63
-
64
-
65
-
66
-
67
-
68
-
69
-
70
-
71
-
72
-
73
-
74
-
75
-
76
-
77
-
78
-
79
-
80
-
81
-
82
-
83
-
84
-
85
-
86
-
87
-
88
-
89
-
90
-
91
-
92
-
93
-
94
-
95
-
96
-
97
-
98
-
99
-
100
-
101
-
102
-
103
-
104
-
105
-
106
-
107
-
108
-
109
-
110
-
111
-
112
-
113
-
114
-
115
-
116
-
117
-
118
-
119
-
120
-
121
-
122
-
123
-
124
-
125
-
126
-
127
-
128
-
129
-
130
-
131
-
132
-
133
-
134
-
135
-
136
-
137
-
138
-
139
-
140
-
141
-
142
-
143
-
144
-
145
-
146
-
147
-
148
-
149
-
150
-
151
-
152
-
153
-
154
-
155
-
156
-
157
-
158
-
159
-
160
-
161
-
162
-
163
-
164
-
165
-
166
-
167
-
168
-
169
-
170
-
171
-
 172
172 -
 173
173 -
 174
174 -
 175
175 -
 176
176 -
 177
177 -
 178
178 -
 179
179 -
 180
180 -
 181
181 -
 182
182 -
183
-
184
-
185
-
186
-
187
-
188
-
189
-
190
-
191
-
192
-
193
-
194
-
195
-
196
-
197
-
198
-
199
-
200
-
201
-
202
-
203
-
204
-
205
-
206
-
207
-
208
-
209
-
210
-
211
-
212
-
213
-
214
-
215
-
216
-
217
-
218
-
219
-
220
-
221
-
222
-
223
-
224
-
225
-
226
-
227
-
228
-
229
-
230
-
231
-
232
-
233
-
234
-
235
-
236
-
237
-
238
-
239
-
240
-
241
-
242
-
243
-
244
-
245
-
246
-
247
-
248
-
249
-
250
-
251
-
252
-
253
-
254
-
255
-
256
-
257
-
258
-
259
-
260
-
261
-
262
-
263
-
264
-
265
-
266
-
267
-
268
-
269
-
270
-
271
-
272
-
273
-
274
-
275
-
276
-
277
-
278
-
279
-
280
-
281
-
282
-
283
-
284
-
285
-
286
-
287
-
288
-
289
-
290
-
291
-
292
-
293
-
294
-
295
-
296
-
297
-
298
-
299
-
300
-
301
-
302
-
303
-
304
-
305
-
306
-
307
-
308
-
309
-
310
-
311
-
312
-
313
-
314
-
315
-
316
-
317
-
318
 |
 |