HP Color LaserJet Enterprise Flow MFP X58045z User Guide - Page 119
Block incoming faxes, Create a list of blocked fax numbers
 |
View all HP Color LaserJet Enterprise Flow MFP X58045z manuals
Add to My Manuals
Save this manual to your list of manuals |
Page 119 highlights
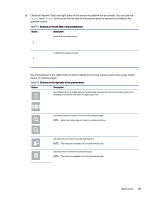
Block incoming faxes Use the fax block list setting to create a list of blocked phone numbers. When a fax is received from a blocked phone number, the fax is not printed and is immediately deleted from memory. Create a list of blocked fax numbers Use the following steps to create the list of fax numbers to block. 1. From the Home screen on the printer control panel, navigate to the Settings application, and then select the Settings icon. 2. Open the following menus: a. Fax b. Fax Receive Settings c. Blocked Fax Numbers 3. Use one of the following options to add a number to the list: ● Select Add Last Sender. ● Select the New Fax Number field, type the number on the keypad that appears, and then select the Enter button . To add additional numbers, type the number and select the Enter button . 4. Select Done. Delete numbers from the list of blocked fax numbers Use the following steps to remove numbers from the list of blocked fax numbers. 1. From the Home screen on the printer control panel, navigate to the Settings application, and then select the Settings icon. 2. Open the following menus: a. Fax b. Fax Receive Settings c. Blocked Fax Numbers 3. Select one or more existing fax numbers in the list, or select Select All if you want to remove all the numbers. 4. Select the Trash button , and then select Delete on the confirmation prompt. Additional fax tasks Locate information on the Web for performing common fax tasks. Go to Support for HP Color LaserJet Enterprise MFP X58045, Support for X58045dn, Support for X58045x, or Support for X58045zs. Instructions are available for fax tasks, such as the following: Block incoming faxes 109
-
 1
1 -
2
-
3
-
4
-
5
-
6
-
7
-
8
-
9
-
10
-
11
-
12
-
13
-
14
-
15
-
16
-
17
-
18
-
19
-
20
-
21
-
22
-
23
-
24
-
25
-
26
-
27
-
28
-
29
-
30
-
31
-
32
-
33
-
34
-
35
-
36
-
37
-
38
-
39
-
40
-
41
-
42
-
43
-
44
-
45
-
46
-
47
-
48
-
49
-
50
-
51
-
52
-
53
-
54
-
55
-
56
-
57
-
58
-
59
-
60
-
61
-
62
-
63
-
64
-
65
-
66
-
67
-
68
-
69
-
70
-
71
-
72
-
73
-
74
-
75
-
76
-
77
-
78
-
79
-
80
-
81
-
82
-
83
-
84
-
85
-
86
-
87
-
88
-
89
-
90
-
91
-
92
-
93
-
94
-
95
-
96
-
97
-
98
-
99
-
100
-
101
-
102
-
103
-
104
-
105
-
106
-
107
-
108
-
109
-
110
-
111
-
112
-
113
-
 114
114 -
 115
115 -
 116
116 -
 117
117 -
 118
118 -
 119
119 -
 120
120 -
 121
121 -
 122
122 -
 123
123 -
 124
124 -
125
-
126
-
127
-
128
-
129
-
130
-
131
-
132
-
133
-
134
-
135
-
136
-
137
-
138
-
139
-
140
-
141
-
142
-
143
-
144
-
145
-
146
-
147
-
148
-
149
-
150
-
151
-
152
-
153
-
154
-
155
-
156
-
157
-
158
-
159
-
160
-
161
-
162
-
163
-
164
-
165
-
166
-
167
-
168
-
169
-
170
-
171
-
172
-
173
-
174
-
175
-
176
-
177
-
178
-
179
-
180
-
181
-
182
-
183
-
184
-
185
-
186
-
187
-
188
-
189
-
190
-
191
-
192
-
193
-
194
-
195
-
196
-
197
-
198
-
199
-
200
-
201
-
202
-
203
-
204
-
205
-
206
-
207
-
208
-
209
-
210
-
211
-
212
-
213
-
214
-
215
-
216
-
217
-
218
-
219
-
220
-
221
-
222
-
223
-
224
 |
 |
