HP Deskjet 6980 Network Guide - Page 12
Reset the printer to factory default settings - manual
 |
UPC - 882780129580
View all HP Deskjet 6980 manuals
Add to My Manuals
Save this manual to your list of manuals |
Page 12 highlights
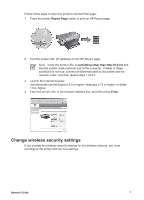
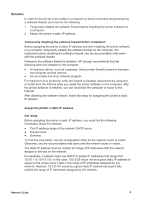
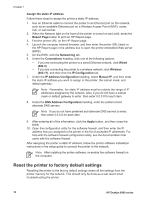
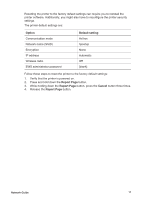
Chapter 1 Assign the static IP address Follow these steps to assign the printer a static IP address: 1. Use an Ethernet cable to connect the printer to an Ethernet port on the network, such as an available Ethernet port on a Wireless Access Point (WAP), router, hub, or wall socket. 2. When the Network light on the front of the printer is turned on and solid, press the Report Page button to print an HP Report page. 3. Find the printer URL on the HP Report page. 4. Launch the computer Internet browser, and then enter the printer URL listed on the HP Report page in the address box to open the printer embedded Web server (EWS). 5. On the EWS, click the Networking tab. 6. Under the Connections heading, click one of the following options: - If you are connecting the printer to a wired Ethernet network, click Wired (802.3). - If you are connecting the printer to a wireless network, click Wireless (802.11), and then click the IP Configuration tab. 7. Under the IP Address Configuration heading, select Manual IP, and then enter the static IP address you want to assign to the printer, the subnet mask, and default gateway. Note Remember, the static IP address must be outside the range of IP addresses assigned by the network. Also, if you do not have a subnet mask or default gateway to enter, then enter 0.0.0.0 for each item. 8. Under the DNS Address Configuration heading, enter the preferred and alternate DNS servers. Note If you do not have preferred and alternate DNS servers to enter, then enter 0.0.0.0 for each item. 9. After entering all of the information, click the Apply button, and then close the EWS. 10. Open the configuration utility for the software firewall, and then enter the IP address that you assigned to the printer in the list of accepted IP addresses. For help with the software firewall configuration utility, see the documentation that came with the software firewall. After assigning the printer a static IP address, follow the printer software installation instructions in the setup guide to connect the printer to the network. Note After installing the printer software, re-enable the software firewall on the computer. Reset the printer to factory default settings Resetting the printer to the factory default settings clears all the settings from the printer memory for the network. This should only be done as a last resort when troubleshooting the printer. 10 HP Deskjet 6980 series
-
 1
1 -
2
-
3
-
4
-
5
-
6
-
 7
7 -
 8
8 -
 9
9 -
 10
10 -
 11
11 -
 12
12 -
 13
13 -
 14
14 -
 15
15 -
 16
16 -
 17
17 -
18
-
19
-
20
-
21
-
22
-
23
-
24
-
25
-
26
-
27
-
28
-
29
-
30
-
31
-
32
 |
 |
