HP Deskjet Ink Advantage 4610 Getting Started Guide - Page 6
HP ePrint, Set up HP ePrint - deskjet ink advantage
 |
View all HP Deskjet Ink Advantage 4610 manuals
Add to My Manuals
Save this manual to your list of manuals |
Page 6 highlights
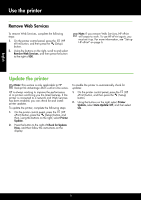
English Use the printer HP ePrint Note: HP ePrint is only supported by HP Deskjet Ink Advantage 4625 e-All-in-One series. HP ePrint is a free service from HP that allows you to print to your HP ePrint-enabled printer anywhere you can send an email. Just send your documents and photos to the email address assigned to your printer when you enable Web Services. No additional drivers or software are needed. Once you have signed up for an account on ePrintCenter (www.eprintcenter.com), you can sign in to view your HP ePrint job status, manage your HP ePrint printer queue, control who can use the HP ePrint email address of your printer to print, and get help for HP ePrint. Note: To use HP ePrint, the printer must be connected to the Internet using wireless connection. You cannot use these web features if the printer is connected using a USB cable. Learn more! To learn more about the Web Services Terms of Use, visit ePrintCenter (www.eprintcenter.com). Set up HP ePrint To set up HP ePrint, complete the following steps. Note: If you have already installed the HP printer software, see the user guide for setup instructions. 1. Place the HP software CD into the computer, and then follow the onscreen instructions. Note: If the firewall software on your computer displays any messages during the installation, select the "always permit/allow" option in the messages. Selecting this option allows the software to install successfully on your computer. 2. Follow the instructions for your operating system: • Windows: When prompted, click Network (Ethernet/Wireless), and then follow the onscreen instructions. • Mac OS X: Double-click the HP Installer icon on the software CD, and then follow the onscreen instructions. Note: If prompted, temporarily connect the printer to the computer with a USB cable. While connected, the computer sends the wireless settings to the printer. After these settings are sent, the installation program will prompt you to disconnect the USB cable. 3. If you are connecting to a wireless network, enter the wireless network name and password (if prompted). 4. When prompted, do the following: • Accept the Web Services Terms of Use. • Enable the printer to automatically check for and install product updates. • If your network uses proxy settings when connecting to the Internet, enter these settings. 5. After the printer prints an information page, follow the instructions to finish the setup. Learn more! For more information about managing and configuring HP ePrint settings and to learn about the latest features, visit ePrintCenter (www.eprintcenter.com). 6
-
 1
1 -
 2
2 -
 3
3 -
 4
4 -
 5
5 -
 6
6 -
 7
7 -
 8
8 -
 9
9 -
 10
10 -
 11
11 -
 12
12 -
13
-
14
-
15
-
16
-
17
-
18
-
19
-
20
-
21
-
22
-
23
-
24
-
25
-
26
-
27
-
28
-
29
-
30
-
31
-
32
-
33
-
34
-
35
-
36
-
37
-
38
-
39
-
40
-
41
-
42
-
43
-
44
-
45
-
46
-
47
-
48
-
49
-
50
-
51
-
52
-
53
-
54
-
55
-
56
-
57
-
58
-
59
-
60
-
61
-
62
-
63
-
64
-
65
-
66
-
67
-
68
-
69
-
70
-
71
-
72
-
73
-
74
-
75
-
76
-
77
-
78
-
79
-
80
 |
 |
