HP ENVY 15-ah100 Maintenance and Service Guide - Page 65
Display assembly – touch screen, three on each hinge that secure the display assembly
 |
View all HP ENVY 15-ah100 manuals
Add to My Manuals
Save this manual to your list of manuals |
Page 65 highlights
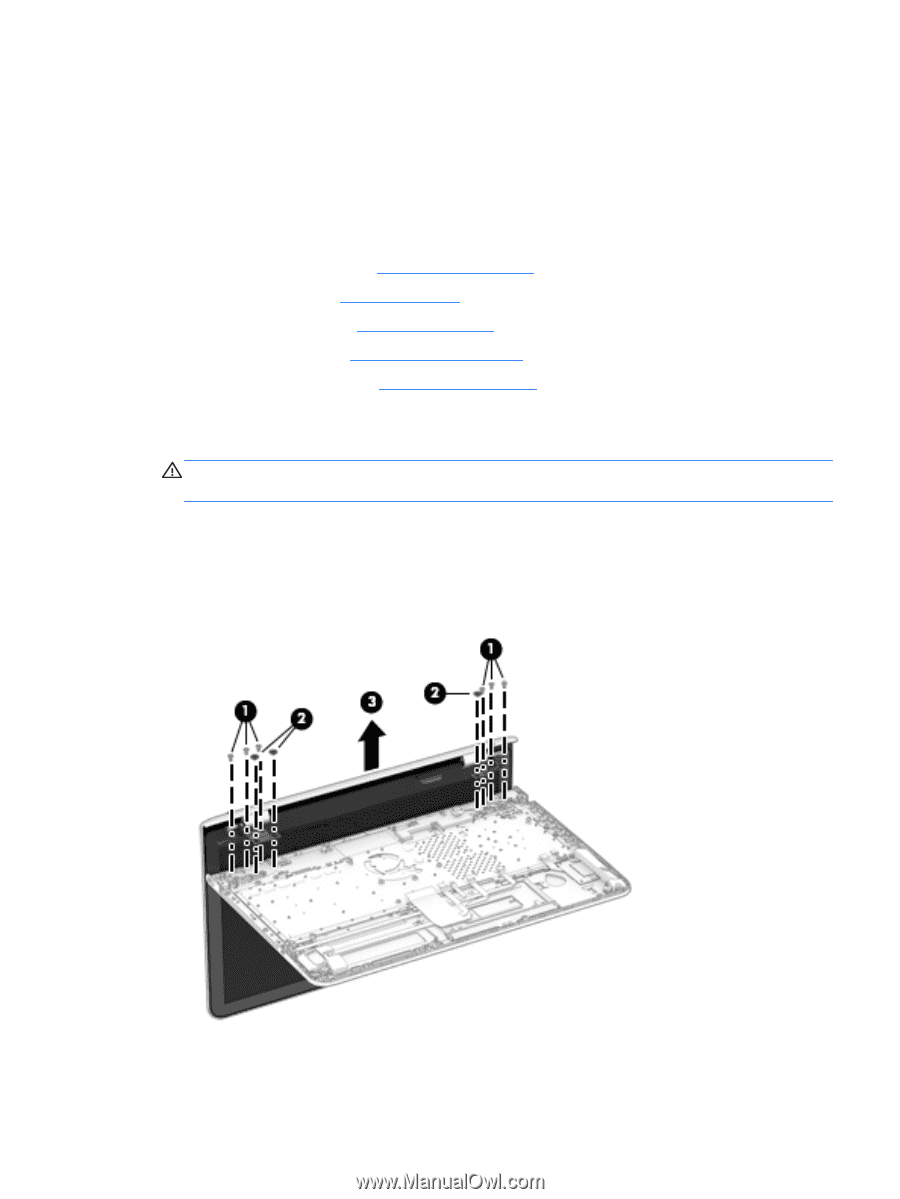
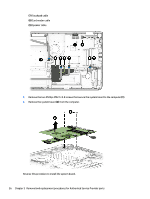
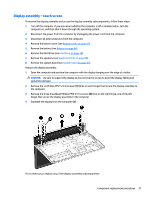
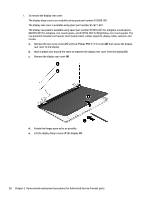
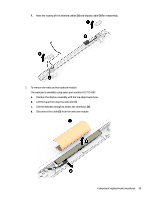
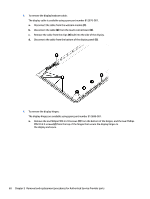
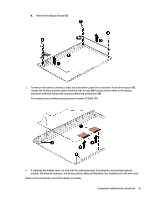
Display assembly - touch screen To remove the display assembly and access the display assembly subcomponents, follow these steps: 1. Turn off the computer. If you are unsure whether the computer is off or in Hibernation, turn the computer on, and then shut it down through the operating system. 2. Disconnect the power from the computer by unplugging the power cord from the computer. 3. Disconnect all external devices from the computer. 4. Remove the bottom cover (see Bottom cover on page 28). 5. Remove the battery (see Battery on page 44). 6. Remove the hard drive (see Hard drive on page 46). 7. Remove the speakers (see Speakers (front) on page 48). 8. Remove the system board (see System board on page 55). Remove the display assembly: 1. Open the computer and position the computer with the display hanging over the edge of a tablet. CAUTION: Be sure to support the display as you remove the screws to avoid the display falling and sustaining damage. 2. Remove the six Phillips PM2.5×4.0 screws (1) (three on each hinge) that secure the display assembly to the computer. 3. Remove the three broadhead Phillips PM2.5×2.5 screws (2) (two on the right hinge, one of the left hinge) that secure the display assembly to the computer. 4. Separate the display from the computer (3). If it is necessary to replace any of the display assembly subcomponents: Component replacement procedures 57
-
 1
1 -
2
-
3
-
4
-
5
-
6
-
7
-
8
-
9
-
10
-
11
-
12
-
13
-
14
-
15
-
16
-
17
-
18
-
19
-
20
-
21
-
22
-
23
-
24
-
25
-
26
-
27
-
28
-
29
-
30
-
31
-
32
-
33
-
34
-
35
-
36
-
37
-
38
-
39
-
40
-
41
-
42
-
43
-
44
-
45
-
46
-
47
-
48
-
49
-
50
-
51
-
52
-
53
-
54
-
55
-
56
-
57
-
58
-
59
-
 60
60 -
 61
61 -
 62
62 -
 63
63 -
 64
64 -
 65
65 -
 66
66 -
 67
67 -
 68
68 -
 69
69 -
 70
70 -
71
-
72
-
73
-
74
-
75
-
76
-
77
-
78
-
79
-
80
-
81
-
82
-
83
-
84
-
85
-
86
-
87
-
88
-
89
-
90
-
91
-
92
-
93
-
94
-
95
-
96
-
97
-
98
-
99
-
100
-
101
-
102
 |
 |