HP K850 Getting Started Guide - Page 7
Heben Sie die
 |
UPC - 882780027831
View all HP K850 manuals
Add to My Manuals
Save this manual to your list of manuals |
Page 7 highlights
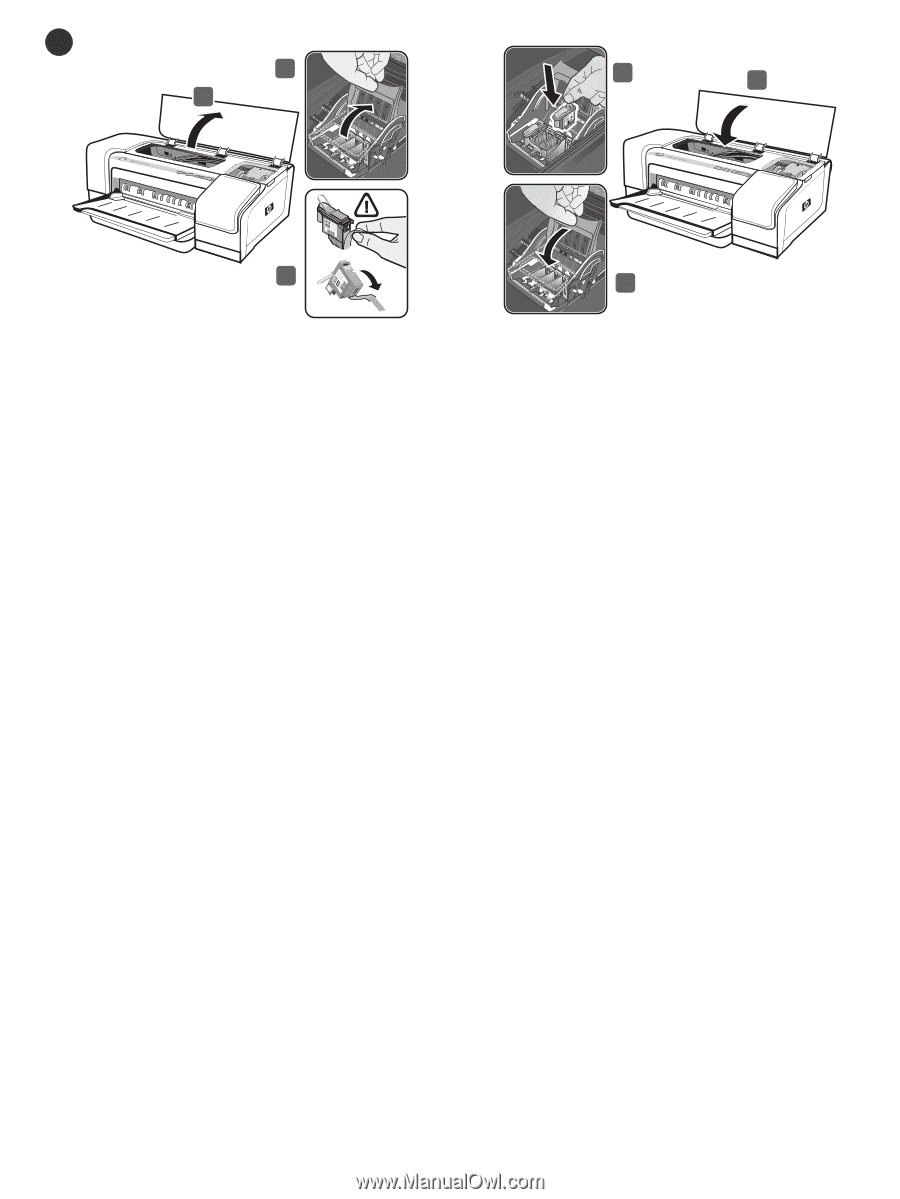
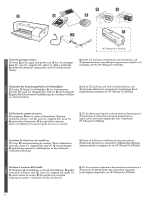
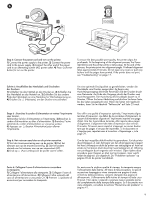
4 2 1 4 6 3 5 Step 4: Install the printheads. 1) Open the top cover. 2) Lift the printhead latch. 3) Remove each printhead from its package, and then remove the protective tape from each printhead. 4) Insert each printhead into its color-coded slot, and then press down firmly on each printhead to ensure proper contact. 5) Close the printhead latch, pressing down to ensure it is in the locked position. 6) Close the top cover. Schritt 4: Einsetzen der Druckköpfe. 1) Öffnen Sie die obere Abdeckung. 2) Heben Sie die Druckkopfverriegelung an. 3) Nehmen Sie die Druckköpfe aus der Verpackung, und ziehen Sie jeweils die Schutzfolie ab. 4) Setzen Sie die Druckköpfe nacheinander in den entsprechenden farbcodierten Steckplatz ein und drücken Sie dann fest auf den Druckkopf, damit der Kontakt gewährleistet ist. 5) Schließen Sie die Druckkopfverriegelung. Drücken Sie sie fest nach unten, so dass sie einrastet. 6) Schließen Sie die obere Abdeckung. Étape 4 : Installation des têtes d'impression. 1) Ouvrez le capot supérieur. 2) Soulevez le loquet des têtes d'impression. 3) Sortez chaque tête d'impression de son emballage, puis retirez le ruban adhésif de protection de chacune d'elles. 4) Insérez chaque tête d'impression dans l'emplacement portant la couleur correspondante, puis appuyez fermement sur chaque tête d'impression vers le bas pour assurer un bon contact. 5) Fermez le loquet de la tête d'impression, puis appuyez dessus pour vous assurer qu'il est en position de verrouillage. 6) Fermez le capot supérieur. Stap 4: Installeer de printkoppen. 1) Open de printerkap. 2) Til de printkopvergrendeling omhoog. 3) Haal de printkoppen uit de verpakking en verwijder de beschermtape van de printkoppen. 4) Plaats de printkoppen in de sleuven met de bijbehorende kleurcode en duw elke printkop stevig op zijn plaats. 5) Sluit de printkopgrendel en druk deze omlaag zodat deze in de vergrendelde positie terechtkomt. 6) Sluit de printerkap. Punto 4: Installare le testine di stampa. 1) Aprire il coperchio superiore. 2) Sollevare il fermo della testina di stampa. 3) Rimuovere ciascuna testina di stampa dal suo imballo, quindi rimuovere il nastro protettivo da ciascuna testina. 4) Inserire ciascuna testina di stampa nel relativo alloggiamento codificato in colore, quindi premere con decisione su ciascuna testina per assicurare il contatto completo. 5) Chiudere il fermo delle testine di stampa, premendo verso il basso per assicurarsi che sia bloccato. 6) Chiudere il coperchio superiore. 7
-
 1
1 -
 2
2 -
 3
3 -
 4
4 -
 5
5 -
 6
6 -
 7
7 -
 8
8 -
 9
9 -
 10
10 -
 11
11 -
 12
12 -
13
-
14
-
15
-
16
-
17
-
18
-
19
-
20
-
21
-
22
-
23
-
24
-
25
-
26
-
27
-
28
-
29
-
30
-
31
-
32
-
33
-
34
-
35
-
36
-
37
-
38
-
39
-
40
-
41
-
42
-
43
-
44
-
45
-
46
-
47
-
48
-
49
-
50
-
51
-
52
-
53
-
54
-
55
-
56
 |
 |