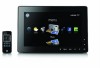
HP KY616AA HP DreamScreen Wireless Connected Screen - User's Guide - Page 43
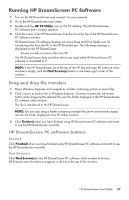
Running HP DreamScreen PC Software, Drag and drop file transfers, HP DreamScreen PC software buttons
 |
UPC - 884420871576
View all HP KY616AA manuals
Add to My Manuals
Save this manual to your list of manuals |
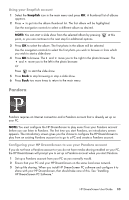
Page 43 highlights
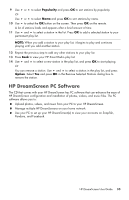
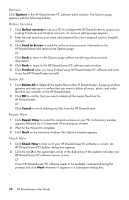
Running HP DreamScreen PC Software 1 Turn on the HP DreamScreen and connect it to your network. 2 Go to the HP DreamScreen main menu. 3 Double-click the HP PC Utility icon on the PC desktop. The HP DreamScreen PC Software main window appears. 4 Click the name of the HP DreamScreen from the list at the top of the HP DreamScreen PC Software window. HP DreamScreen PC software displays an active Drag and Drop folder icon for transferring files from the PC to the HP DreamScreen. The following message is displayed on the HP DreamScreen: Screen is ready to receive files from PC The HP DreamScreen does not allow direct user input while HP DreamScreen PC software is connected to it. NOTE: If the HP DreamScreen list at the top of the HP DreamScreen PC software utility window is empty, click the Find Screen(s) button in the lower-right corner of the window. Drag and drop file transfers 1 Open Windows Explorer and navigate to a folder containing picture or music files. 2 Click a music or picture file in Windows Explorer. Continue to press the left mouse button while dragging the selected file over the folder displayed in the HP DreamScreen PC software utility window. The file is transferred to the HP DreamScreen. NOTE: You can also drag a folder containing multiple files (even mixed media types) into the file folder displayed in the PC Utility window. 3 Click Finished when you have finished using HP DreamScreen PC software and want to use the HP DreamScreen normally. HP DreamScreen PC software buttons Finished Click Finished when you have finished using HP DreamScreen PC software and want to use the HP DreamScreen normally. Find Screen(s) Click Find Screen(s) in the HP DreamScreen PC software utility window to find an HP DreamScreen that does not appear in the list at the top of the window. HP DreamScreen User Guide 37
-
 1
1 -
2
-
3
-
4
-
5
-
6
-
7
-
8
-
9
-
10
-
11
-
12
-
13
-
14
-
15
-
16
-
17
-
18
-
19
-
20
-
21
-
22
-
23
-
24
-
25
-
26
-
27
-
28
-
29
-
30
-
31
-
32
-
33
-
34
-
35
-
36
-
37
-
 38
38 -
 39
39 -
 40
40 -
 41
41 -
 42
42 -
 43
43 -
 44
44 -
 45
45 -
 46
46 -
 47
47 -
 48
48 -
49
-
50
-
51
-
52
-
53
-
54
-
55
-
56
-
57
-
58
 |
 |
