HP LH4r Pedestal-to-Rack Conversion Guide - Page 8
Warnings, Install the Cable Management Arm.
 |
View all HP LH4r manuals
Add to My Manuals
Save this manual to your list of manuals |
Page 8 highlights
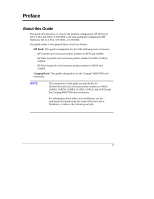
Chapter 1 Introduction 5. Remove the plastic lock pawl (which engages and secures the bezel lock mechanism) from the NetServer chassis front. Unfasten the control panel from the chassis, reorient it, and then secure it to the chassis again. Install the control panel bezel. 6. Install the slides in the rack, and install the NetServer in the rack. 7. Replace the power supply modules and hard disk drives. 8. For shipping HP racks, install the rack chassis retention bracket to secure the NetServer to the rear of the rack. 9. Install the bezel mounting hardware, and install the new front bezel. 10. Install the Cable Management Arm. 11. Reconnect the AC power cord(s) and other external cables. Warnings Observe the warnings below to prevent harm to you or the NetServer. Also observe all cautions and warnings in this document and other documents to protect people, the NetServer, components, and other equipment. WARNING Before removing the cover, always disconnect the power cord(s) and unplug telephone cables. Disconnect the power cord(s) to avoid exposure to high energy levels that may cause burns when parts are short-circuited by metal objects, such as tools or jewelry. Disconnect telephone cables to avoid exposure to shock hazard from telephone ringing devices. Note that the power switch does not turn off the standby power. Disconnect the power cord(s) to turn off standby power. If the backlight on the LCD display is on, standby power is still on. 4
-
 1
1 -
2
-
 3
3 -
 4
4 -
 5
5 -
 6
6 -
 7
7 -
 8
8 -
 9
9 -
 10
10 -
 11
11 -
 12
12 -
 13
13 -
14
-
15
-
16
-
17
-
18
-
19
-
20
-
21
-
22
-
23
-
24
-
25
-
26
-
27
-
28
-
29
-
30
-
31
-
32
-
33
-
34
-
35
-
36
-
37
-
38
-
39
-
40
-
41
-
42
-
43
-
44
-
45
-
46
-
47
-
48
 |
 |
