HP M537 User Guide - Page 21
Removing red eyes, Playback, Playback Menu, Save Changes, View Changes - photosmart instructions
 |
UPC - 882780834033
View all HP M537 manuals
Add to My Manuals
Save this manual to your list of manuals |
Page 21 highlights
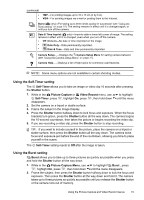
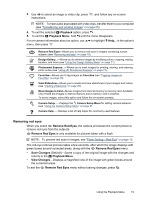
3. Use to select an image or video clip, press , and follow any on-screen instructions. NOTE: To hear audio associated with video clips, transfer them to your computer (see "Transferring and printing images" on page 23). 4. To exit the selected Playback option, press . 5. To exit the Playback Menu, hold until the menu disappears. For on-camera information about an option, use menu, then press . to highlight Help... in the option's Remove Red Eyes-Allows you to remove red eyes in images containing human subjects (see "Removing red eyes" on page 19). Design Gallery...-Allows you to enhance images by modifying colors, cropping, adding borders, and more (see "Using the Design Gallery Menu" on page 21). Photosmart Express...-Allows you to mark images for printing, sharing, and ordering prints online (see "Using HP Photosmart Express" on page 27). Favorites-Allows you to tag images as Favorites (see "Tagging images as Favorites" on page 20). View Slideshow-Allows you to create and view slideshows of your images and videos (see "Viewing slideshows" on page 20). Move Images to Card-Moves images from internal memory to memory card. Available only if there are images in internal memory and a memory card is inserted. To move images, select this option and follow the on-screen prompts. Camera Setup...-Displays the Camera Setup Menu for setting camera behavior (see "Using the Camera Setup Menu" on page 31 Camera Help...-Displays a list of help topics for commonly used features. Removing red eyes When you select Remove Red Eyes, the camera processes the current picture to remove red eyes from the subjects. Remove Red Eyes is only available for pictures taken with a flash. NOTE: To prevent red eyes in images, see "Flash Setting-Red-Eye" on page 13. The red-eye removal process takes a few seconds, after which the image displays with green boxes around corrected areas, along with the Remove Red Eyes menu: • Save Changes (Default)-Saves a copy of the original image with the changes and returns to the Playback Menu. • View Changes-Displays a magnified view of the image with green boxes around the corrected areas. To exit the Remove Red Eyes menu without saving changes, press . Using the Playback Menu 19
-
 1
1 -
2
-
3
-
4
-
5
-
6
-
7
-
8
-
9
-
10
-
11
-
12
-
13
-
14
-
15
-
 16
16 -
 17
17 -
 18
18 -
 19
19 -
 20
20 -
 21
21 -
 22
22 -
 23
23 -
 24
24 -
 25
25 -
 26
26 -
27
-
28
-
29
-
30
-
31
-
32
-
33
-
34
-
35
-
36
-
37
-
38
-
39
-
40
-
41
-
42
-
43
-
44
-
45
-
46
-
47
-
48
-
49
 |
 |
