HP M537 User Guide - Page 9
Using your camera, Double-click the installer icon, then follow the on-screen instructions. - photosmart review
 |
UPC - 882780834033
View all HP M537 manuals
Add to My Manuals
Save this manual to your list of manuals |
Page 9 highlights
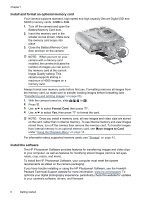
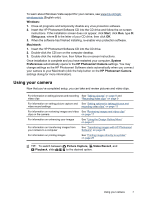
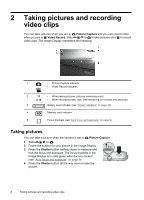
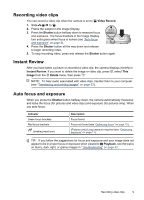
To learn about Windows Vista support for your camera, see www.hp.com/go/ windowsvista (English only). Windows: 1. Close all programs and temporarily disable any virus protection software. 2. Insert the HP Photosmart Software CD into the CD drive and follow the on-screen instructions. If the installation screen does not appear, click Start, click Run, type D: \Setup.exe, where D is the letter of your CD drive, then click OK. 3. When the software has finished installing, re-enable virus protection software. Macintosh: 1. Insert the HP Photosmart Software CD into the CD drive. 2. Double-click the CD icon on the computer desktop. 3. Double-click the installer icon, then follow the on-screen instructions. Once installation is complete and you have restarted your computer, System Preferences automatically opens to the HP Photosmart Camera settings. You may change settings so the HP Photosmart Software starts automatically when you connect your camera to your Macintosh (click the help button on the HP Photosmart Camera settings dialog for more information). Using your camera Now that you've completed setup, you can take and review pictures and video clips. For information on taking pictures and recording See "Taking pictures" on page 8 and video clips "Recording video clips" on page 9 For information on setting picture capture and See "Setting options for taking pictures and video record settings recording video clips" on page 13 For information on reviewing images and video See "Reviewing images and video clips" clips on the camera on page 17 For information on enhancing your images See "Using the Design Gallery Menu" on page 21 For information on transferring images from your camera to a computer See "Transferring images with HP Photosmart Software" on page 23 For information on printing images See "Printing images directly to a printer" on page 25 TIP: To switch between Picture Capture, Video Record, and Playback, slide to the desired option. Using your camera 7
-
 1
1 -
2
-
3
-
 4
4 -
 5
5 -
 6
6 -
 7
7 -
 8
8 -
 9
9 -
 10
10 -
 11
11 -
 12
12 -
 13
13 -
 14
14 -
15
-
16
-
17
-
18
-
19
-
20
-
21
-
22
-
23
-
24
-
25
-
26
-
27
-
28
-
29
-
30
-
31
-
32
-
33
-
34
-
35
-
36
-
37
-
38
-
39
-
40
-
41
-
42
-
43
-
44
-
45
-
46
-
47
-
48
-
49
 |
 |