HP Officejet J3600 User Guide - Page 76
HP Printer Utility panels, Set up faxing for the device
 |
View all HP Officejet J3600 manuals
Add to My Manuals
Save this manual to your list of manuals |
Page 76 highlights
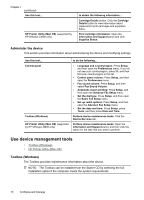
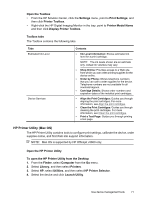
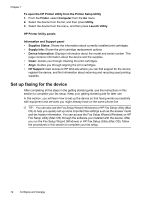
Chapter 7 To open the HP Printer Utility from the Printer Setup Utility 1. From the Finder, select Computer from the Go menu. 2. Select the device from the list, and then press Utility. 3. Select the device from the menu, and then press Launch Utility. HP Printer Utility panels Information and Support panel • Supplies Status: Shows the information about currently installed print cartridges. • Supply Info: Shows the print cartridge replacement options. • Device Information: Displays information about the model and serial number. This page contains information about the device and the supplies. • Clean: Guides you through cleaning the print cartridges. • Align: Guides you through aligning the print cartridges. • HP Support: Gain access to HP Web site where you can find support for the device, register the device, and find information about returning and recycling used printing supplies. Set up faxing for the device After completing all the steps in the getting started guide, use the instructions in this section to complete your fax setup. Keep your getting started guide for later use. In this section, you will learn how to set up the device so that faxing works successfully with equipment and services you might already have on the same phone line. TIP: You can also use the Fax Setup Wizard (Windows) or HP Fax Setup Utility (Mac OS) to help you quickly set up some important fax settings such as the answer mode and fax header information. You can access the Fax Setup Wizard (Windows) or HP Fax Setup Utility (Mac OS) through the software you installed with the device. After you run the Fax Setup Wizard (Windows) or HP Fax Setup Utility (Mac OS), follow the procedures in this section to complete your fax setup. 72 Configure and manage
-
 1
1 -
2
-
3
-
4
-
5
-
6
-
7
-
8
-
9
-
10
-
11
-
12
-
13
-
14
-
15
-
16
-
17
-
18
-
19
-
20
-
21
-
22
-
23
-
24
-
25
-
26
-
27
-
28
-
29
-
30
-
31
-
32
-
33
-
34
-
35
-
36
-
37
-
38
-
39
-
40
-
41
-
42
-
43
-
44
-
45
-
46
-
47
-
48
-
49
-
50
-
51
-
52
-
53
-
54
-
55
-
56
-
57
-
58
-
59
-
60
-
61
-
62
-
63
-
64
-
65
-
66
-
67
-
68
-
69
-
70
-
 71
71 -
 72
72 -
 73
73 -
 74
74 -
 75
75 -
 76
76 -
 77
77 -
 78
78 -
 79
79 -
 80
80 -
 81
81 -
82
-
83
-
84
-
85
-
86
-
87
-
88
-
89
-
90
-
91
-
92
-
93
-
94
-
95
-
96
-
97
-
98
-
99
-
100
-
101
-
102
-
103
-
104
-
105
-
106
-
107
-
108
-
109
-
110
-
111
-
112
-
113
-
114
-
115
-
116
-
117
-
118
-
119
-
120
-
121
-
122
-
123
-
124
-
125
-
126
-
127
-
128
-
129
-
130
-
131
-
132
-
133
-
134
-
135
-
136
-
137
-
138
-
139
-
140
-
141
-
142
-
143
-
144
-
145
-
146
-
147
-
148
-
149
-
150
-
151
-
152
-
153
-
154
-
155
-
156
-
157
-
158
-
159
-
160
-
161
-
162
-
163
-
164
-
165
-
166
-
167
-
168
-
169
-
170
-
171
-
172
-
173
-
174
-
175
-
176
-
177
-
178
-
179
-
180
-
181
-
182
-
183
-
184
-
185
-
186
 |
 |