HP Officejet Pro X451 HP Officejet X Series - Software Technical Reference - Page 32
Finishing tab, Current Watermarks, Untitled, Watermark Message, Username], Delete, Message Angle
 |
View all HP Officejet Pro X451 manuals
Add to My Manuals
Save this manual to your list of manuals |
Page 32 highlights
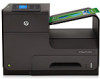
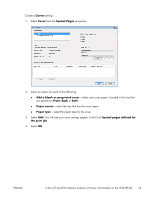
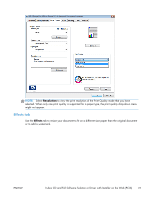
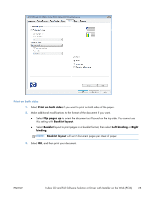
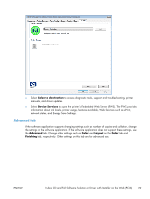
Edit or create a watermark 1. From the Current Watermarks menu select New, if you want to create a new watermark, or select an existing watermark. ● If you select New, Untitled will appear in the menu, and in the Watermark Message text box below. Type your watermark text in the message box to add it to the menu. ● If you select [Username], the watermark will be the username that you use to log into the network. NOTE: You can save up to 30 watermarks. If you want to delete a watermark, highlight the watermark, and then select Delete. 2. Edit the appearance of your watermark. Use Message Angle and Font Attributes to edit the appearance of your watermark. You can change the angle of the text and modify the type, color, shading, size, and style of the font. Refer to the print preview image in the upper right corner of the printer driver to view the changes that you have made. 3. Select OK to save your settings. If you make changes to multiple watermarks before selecting OK, these changes will also be saved. 4. Define the pages that the watermark should be printed on. ● If you only want the watermark on the first page of the document, check First page only, on the Watermark dialog box of the Effects tab. ● If you want the watermark on every page of the document, uncheck First page only, on the Watermark dialog box of the Effects tab. NOTE: If your document has watermarks on every page, and you print multiple pages of a document on a sheet of paper, the watermark will appear on every page of the document within the physical sheet. So if you print two pages per physical sheet, a watermark will be printed twice on the physical sheet. Finishing tab Use the Finishing tab to print on both sides of the paper, print booklets, print multiple pages of a document on one sheet of paper, and change the orientation of the document. 24 Chapter 2 Windows software ENWW
-
 1
1 -
2
-
3
-
4
-
5
-
6
-
7
-
8
-
9
-
10
-
11
-
12
-
13
-
14
-
15
-
16
-
17
-
18
-
19
-
20
-
21
-
22
-
23
-
24
-
25
-
26
-
 27
27 -
 28
28 -
 29
29 -
 30
30 -
 31
31 -
 32
32 -
 33
33 -
 34
34 -
 35
35 -
 36
36 -
 37
37 -
38
-
39
-
40
-
41
-
42
-
43
-
44
-
45
-
46
-
47
-
48
-
49
-
50
-
51
-
52
-
53
-
54
-
55
-
56
-
57
-
58
-
59
-
60
-
61
-
62
-
63
-
64
-
65
-
66
-
67
-
68
-
69
-
70
 |
 |