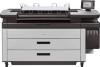
HP PageWide XL 4000 User Guide - Page 24
Uninstall the printer software (Mac OS X), Con your connectivity, Configure
 |
View all HP PageWide XL 4000 manuals
Add to My Manuals
Save this manual to your list of manuals |
Page 24 highlights
Before you begin, check your equipment: ● The printer should be set up and on. ● The Ethernet switch or router should be on and functioning correctly. ● The printer and the computer should be connected to the network (see Connect the printer to your network on page 16). Now you can proceed to install the printer software and connect to your printer. 1. Go to the front panel and tap . Note the mDNS service name of your printer. 2. Access the install package from HP's website: http://www.hp.com/go/pagewidexlseries/support/drivers. If prompted, select your printer from the list. 3. When the PageWide Printer window appears on your screen, click Software and drivers. 4. Select Windows or Mac OS X software, and choose which specific software you want to install (by default, all of it). 5. When the software has been installed, the HP Utility starts automatically, to set up a connection to your printer. Follow the instructions on your screen. 6. In the Setup Assistant screen, look for your printer's mDNS service name (which you noted in step 1) in the Printer Name column. ● If you find the right name, scroll sideways if necessary to see the Connection Type column, and check that it shows Bonjour. Then highlight that line. Otherwise, continue searching further down the list. ● If you cannot find your printer's name just click Continue and do the setup manually in your System Preferences later on. Click Continue. 7. Continue following the instructions on the screen. Uninstall the printer software (Mac OS X) During the previous installation step, you have the option to install the HP Uninstaller application in your system. This should be available under HP in the system Applications folder. IMPORTANT: The HP Uninstaller application will uninstall all HP Software installed in your system. To delete the print queue only, select the Print & Scan dialog from the system preferences. Click the name of the printer and then click the - button. Configure your connectivity By configuring your connectivity, you can print from your local network, keep your printer up to date, and access additional printer services. Remember to connect your network cable to the printer. Accept the connectivity agreement and settings in order to: ● Receive automatic firmware updates ● Participate in the Customer Involvement Program 18 Chapter 1 Introduction ENWW
-
 1
1 -
2
-
3
-
4
-
5
-
6
-
7
-
8
-
9
-
10
-
11
-
12
-
13
-
14
-
15
-
16
-
17
-
18
-
 19
19 -
 20
20 -
 21
21 -
 22
22 -
 23
23 -
 24
24 -
 25
25 -
 26
26 -
 27
27 -
 28
28 -
 29
29 -
30
-
31
-
32
-
33
-
34
-
35
-
36
-
37
-
38
-
39
-
40
-
41
-
42
-
43
-
44
-
45
-
46
-
47
-
48
-
49
-
50
-
51
-
52
-
53
-
54
-
55
-
56
-
57
-
58
-
59
-
60
-
61
-
62
-
63
-
64
-
65
-
66
-
67
-
68
-
69
-
70
-
71
-
72
-
73
-
74
-
75
-
76
-
77
-
78
-
79
-
80
-
81
-
82
-
83
-
84
-
85
-
86
-
87
-
88
-
89
-
90
-
91
-
92
-
93
-
94
-
95
-
96
-
97
-
98
-
99
-
100
-
101
-
102
-
103
-
104
-
105
-
106
-
107
-
108
-
109
-
110
-
111
-
112
-
113
-
114
-
115
-
116
-
117
-
118
-
119
-
120
-
121
-
122
-
123
-
124
-
125
-
126
-
127
-
128
-
129
-
130
-
131
-
132
-
133
-
134
-
135
-
136
-
137
-
138
-
139
-
140
-
141
-
142
-
143
-
144
-
145
-
146
-
147
-
148
-
149
-
150
-
151
-
152
-
153
-
154
-
155
-
156
-
157
-
158
-
159
-
160
-
161
-
162
-
163
-
164
-
165
-
166
-
167
-
168
-
169
-
170
-
171
-
172
-
173
-
174
-
175
-
176
-
177
-
178
-
179
-
180
-
181
-
182
-
183
-
184
-
185
-
186
-
187
-
188
-
189
-
190
-
191
-
192
-
193
 |
 |