HP Pavilion dm1-4000 User Guide HP Notebook - Windows 7 - Page 71
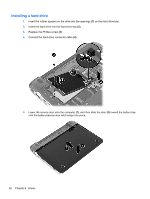
that secures the hard drive to the computer., and then remove the hard drive
 |
View all HP Pavilion dm1-4000 manuals
Add to My Manuals
Save this manual to your list of manuals |
Page 71 highlights
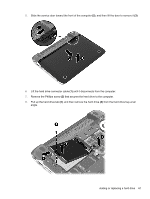
5. Slide the service door toward the front of the computer (2), and then lift the door to remove it (3). 6. Lift the hard drive connector cable (1) until it disconnects from the computer. 7. Remove the Phillips screw (2) that secures the hard drive to the computer. 8. Pull up the hard drive tab (3), and then remove the hard drive (4) from the hard drive bay at an angle. Adding or replacing a hard drive 61
-
 1
1 -
2
-
3
-
4
-
5
-
6
-
7
-
8
-
9
-
10
-
11
-
12
-
13
-
14
-
15
-
16
-
17
-
18
-
19
-
20
-
21
-
22
-
23
-
24
-
25
-
26
-
27
-
28
-
29
-
30
-
31
-
32
-
33
-
34
-
35
-
36
-
37
-
38
-
39
-
40
-
41
-
42
-
43
-
44
-
45
-
46
-
47
-
48
-
49
-
50
-
51
-
52
-
53
-
54
-
55
-
56
-
57
-
58
-
59
-
60
-
61
-
62
-
63
-
64
-
65
-
 66
66 -
 67
67 -
 68
68 -
 69
69 -
 70
70 -
 71
71 -
 72
72 -
 73
73 -
 74
74 -
 75
75 -
 76
76 -
77
-
78
-
79
-
80
-
81
-
82
-
83
-
84
-
85
-
86
-
87
-
88
-
89
-
90
-
91
-
92
-
93
-
94
-
95
-
96
-
97
-
98
-
99
-
100
-
101
-
102
-
103
-
104
-
105
-
106
-
107
-
108
-
109
 |
 |
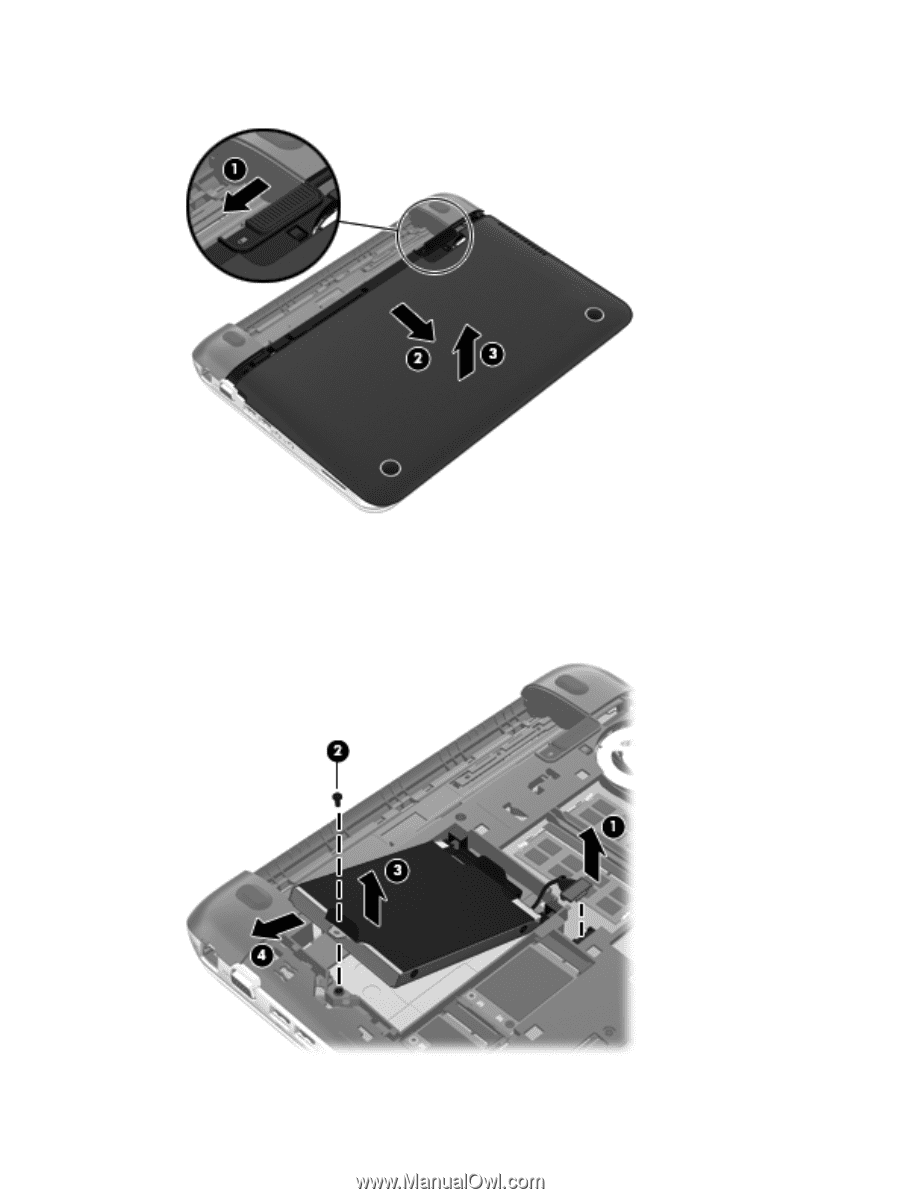
5.
Slide the service door toward the front of the computer
(2)
, and then lift the door to remove it
(3)
.
6.
Lift the hard drive connector cable
(1)
until it disconnects from the computer.
7.
Remove the Phillips screw
(2)
that secures the hard drive to the computer.
8.
Pull up the hard drive tab
(3)
, and then remove the hard drive
(4)
from the hard drive bay at an
angle.
Adding or replacing a hard drive
61