HP Photosmart 3300 User Guide - Page 31
Set the date and time, Adjust the volume, Preferences, Set Language & Country, Region, Setup - parts
 |
View all HP Photosmart 3300 manuals
Add to My Manuals
Save this manual to your list of manuals |
Page 31 highlights
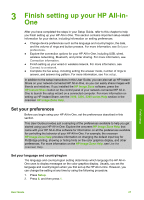
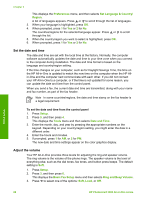
Chapter 3 This displays the Preferences menu, and then selects Set Language & Country/ Region. A list of languages appears. Press or to scroll through the list of languages. 3. When your language is highlighted, press OK. 4. When prompted, press 1 for Yes or 2 for No. The countries/regions for the selected language appear. Press or to scroll through the list. 5. When the country/region you want to select is highlighted, press OK. 6. When prompted, press 1 for Yes or 2 for No. Set the date and time The date and time are set with the local time at the factory. Normally, the computer software automatically updates the date and time to your time zone when you connect to the computer during installation. The date and time format is based on the language and country/region setting. If the time changes on your computer, such as for Daylight Savings Time, the time on the HP All-in-One is updated to match the new time on the computer when the HP Allin-One and the computer next communicate with each other. If you did not connect your HP All-in-One to a computer, or if the time is not updated for some reason, you can update the date and time from the control panel. When you send a fax, the current date and time are transmitted, along with your name and fax number, as part of the fax header. Note In some countries/regions, the date and time stamp on the fax header is a legal requirement. To set the date and time from the control panel 1. Press Setup. 2. Press 5, and then press 4. This displays the Tools menu and then selects Date and Time. 3. Enter the month, day, and year by pressing the appropriate numbers on the keypad. Depending on your country/region setting, you might enter the date in a different order. 4. Enter the hours and minutes. 5. If prompted, press 1 for AM, or 2 for PM. The new date and time settings appear on the color graphics display. Adjust the volume Your HP All-in-One provides three levels for adjusting the ring and speaker volume. The ring volume is the volume of the phone rings. The speaker volume is the level of everything else, such as the dial tones, fax tones, and button press beeps. The default setting is Soft. 1. Press Setup. 2. Press 3, and then press 6. This displays the Basic Fax Setup menu and then selects Ring and Beep Volume. 3. Press to select one of the options: Soft, Loud, or Off. Finish setup 28 HP Photosmart 3300 All-in-One series
-
 1
1 -
2
-
3
-
4
-
5
-
6
-
7
-
8
-
9
-
10
-
11
-
12
-
13
-
14
-
15
-
16
-
17
-
18
-
19
-
20
-
21
-
22
-
23
-
24
-
25
-
 26
26 -
 27
27 -
 28
28 -
 29
29 -
 30
30 -
 31
31 -
 32
32 -
 33
33 -
 34
34 -
 35
35 -
 36
36 -
37
-
38
-
39
-
40
-
41
-
42
-
43
-
44
-
45
-
46
-
47
-
48
-
49
-
50
-
51
-
52
-
53
-
54
-
55
-
56
-
57
-
58
-
59
-
60
-
61
-
62
-
63
-
64
-
65
-
66
-
67
-
68
-
69
-
70
-
71
-
72
-
73
-
74
-
75
-
76
-
77
-
78
-
79
-
80
-
81
-
82
-
83
-
84
-
85
-
86
-
87
-
88
-
89
-
90
-
91
-
92
-
93
-
94
-
95
-
96
-
97
-
98
-
99
-
100
-
101
-
102
-
103
-
104
-
105
-
106
-
107
-
108
-
109
-
110
-
111
-
112
-
113
-
114
-
115
-
116
-
117
-
118
-
119
-
120
-
121
-
122
-
123
-
124
-
125
-
126
-
127
-
128
-
129
-
130
-
131
-
132
-
133
-
134
-
135
-
136
-
137
-
138
-
139
-
140
-
141
-
142
-
143
-
144
-
145
-
146
-
147
-
148
-
149
-
150
-
151
-
152
-
153
-
154
-
155
-
156
-
157
-
158
-
159
-
160
-
161
-
162
-
163
-
164
-
165
-
166
-
167
-
168
-
169
-
170
-
171
-
172
-
173
-
174
-
175
-
176
-
177
-
178
-
179
-
180
-
181
-
182
-
183
-
184
-
185
-
186
-
187
-
188
-
189
-
190
-
191
-
192
-
193
-
194
-
195
-
196
-
197
-
198
-
199
-
200
-
201
-
202
-
203
-
204
-
205
-
206
-
207
-
208
-
209
-
210
-
211
-
212
 |
 |