HP Photosmart 3300 User Guide - Page 73
Connect your HP All-in-One to the network, Install the software for a network connection
 |
View all HP Photosmart 3300 manuals
Add to My Manuals
Save this manual to your list of manuals |
Page 73 highlights
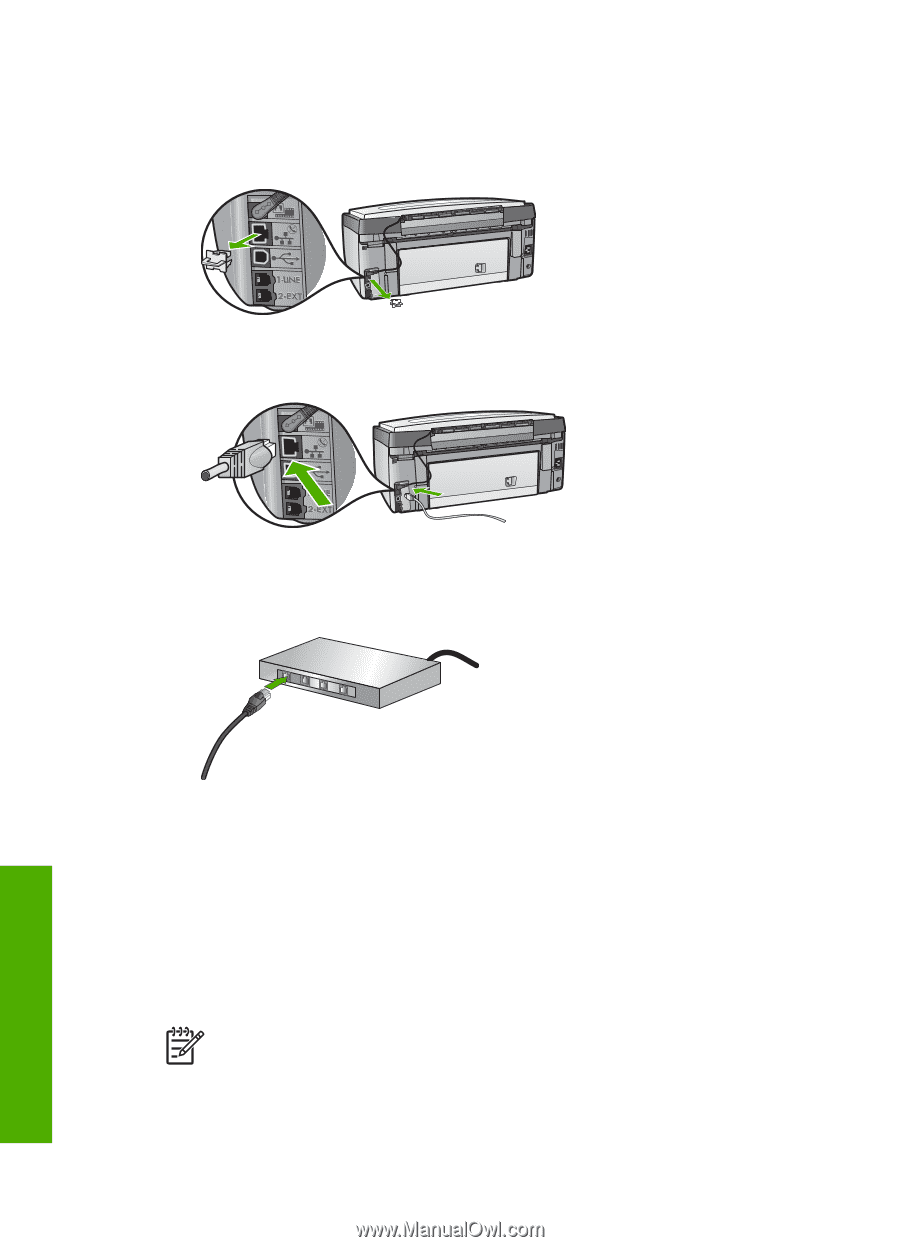
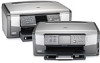
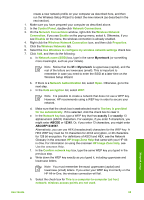
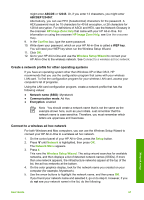
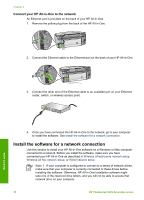
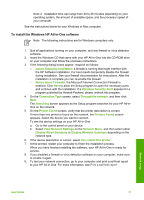
Chapter 4 Connect your HP All-in-One to the network An Ethernet port is provided on the back of your HP All-in-One. 1. Remove the yellow plug from the back of the HP All-in-One. 2. Connect the Ethernet cable to the Ethernet port on the back of your HP All-in-One. 3. Connect the other end of the Ethernet cable to an available port on your Ethernet router, switch, or wireless access point. Network setup 4. Once you have connected the HP All-in-One to the network, go to your computer to install the software. See Install the software for a network connection. Install the software for a network connection Use this section to install your HP All-in-One software on a Windows or Mac computer connected to a network. Before you install the software, make sure you have connected your HP All-in-One as described in Wireless infrastructure network setup, Wireless ad hoc network setup, or Wired network setup. Note 1 If your computer is configured to connect to a series of network drives, make sure that your computer is currently connected to these drives before installing the software. Otherwise, HP All-in-One installation software might take one of the reserved drive letters, and you will not be able to access that network drive on your computer. 70 HP Photosmart 3300 All-in-One series
-
 1
1 -
2
-
3
-
4
-
5
-
6
-
7
-
8
-
9
-
10
-
11
-
12
-
13
-
14
-
15
-
16
-
17
-
18
-
19
-
20
-
21
-
22
-
23
-
24
-
25
-
26
-
27
-
28
-
29
-
30
-
31
-
32
-
33
-
34
-
35
-
36
-
37
-
38
-
39
-
40
-
41
-
42
-
43
-
44
-
45
-
46
-
47
-
48
-
49
-
50
-
51
-
52
-
53
-
54
-
55
-
56
-
57
-
58
-
59
-
60
-
61
-
62
-
63
-
64
-
65
-
66
-
67
-
 68
68 -
 69
69 -
 70
70 -
 71
71 -
 72
72 -
 73
73 -
 74
74 -
 75
75 -
 76
76 -
 77
77 -
 78
78 -
79
-
80
-
81
-
82
-
83
-
84
-
85
-
86
-
87
-
88
-
89
-
90
-
91
-
92
-
93
-
94
-
95
-
96
-
97
-
98
-
99
-
100
-
101
-
102
-
103
-
104
-
105
-
106
-
107
-
108
-
109
-
110
-
111
-
112
-
113
-
114
-
115
-
116
-
117
-
118
-
119
-
120
-
121
-
122
-
123
-
124
-
125
-
126
-
127
-
128
-
129
-
130
-
131
-
132
-
133
-
134
-
135
-
136
-
137
-
138
-
139
-
140
-
141
-
142
-
143
-
144
-
145
-
146
-
147
-
148
-
149
-
150
-
151
-
152
-
153
-
154
-
155
-
156
-
157
-
158
-
159
-
160
-
161
-
162
-
163
-
164
-
165
-
166
-
167
-
168
-
169
-
170
-
171
-
172
-
173
-
174
-
175
-
176
-
177
-
178
-
179
-
180
-
181
-
182
-
183
-
184
-
185
-
186
-
187
-
188
-
189
-
190
-
191
-
192
-
193
-
194
-
195
-
196
-
197
-
198
-
199
-
200
-
201
-
202
-
203
-
204
-
205
-
206
-
207
-
208
-
209
-
210
-
211
-
212
 |
 |