HP Photosmart 6510 User Guide - Page 21
Print, Print photos from a memory card - won t turn on
 |
View all HP Photosmart 6510 manuals
Add to My Manuals
Save this manual to your list of manuals |
Page 21 highlights
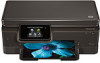
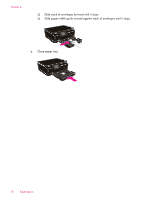
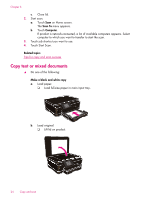
5 Print Print photos from a memory card Print from anywhere Related topics Load media Print from anywhere Tips for print success Print photos from a memory card To print photos from a memory card 1. Load photo paper into the paper tray. 2. Make sure the paper tray extender is open. 3. Insert a memory card into the memory card slot. 4. From the Home screen, touch Photo to display the Photo menu. 5. On the Photo menu, touch View & Print to display photos. 6. Touch a photo that you want to print. 7. Touch the up or down arrow to specify the number of photos to print. 8. Touch Edit to select options to edit the selected photos. You can rotate, crop a photo, or turn Photo Fix on and off. 9. Touch Preview to preview the selected photo. If you wish to adjust layout, paper type, red eye removal, or date stamp, touch Settings, and then touch your selection. You can also save any new settings as defaults. 10. Touch Print to begin printing. Print 19
-
 1
1 -
2
-
3
-
4
-
5
-
6
-
7
-
8
-
9
-
10
-
11
-
12
-
13
-
14
-
15
-
 16
16 -
 17
17 -
 18
18 -
 19
19 -
 20
20 -
 21
21 -
 22
22 -
 23
23 -
 24
24 -
 25
25 -
 26
26 -
27
-
28
-
29
-
30
-
31
-
32
-
33
-
34
-
35
-
36
-
37
-
38
-
39
-
40
-
41
-
42
-
43
-
44
-
45
-
46
-
47
-
48
-
49
-
50
-
51
-
52
-
53
-
54
-
55
-
56
-
57
-
58
-
59
-
60
-
61
-
62
-
63
-
64
 |
 |
