HP Photosmart C4524 Basic Guide - Page 10
Con your firewall to work with HP products, Printers and Faxes - all in one printer
 |
View all HP Photosmart C4524 manuals
Add to My Manuals
Save this manual to your list of manuals |
Page 10 highlights
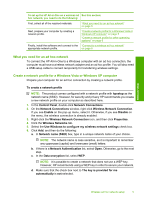
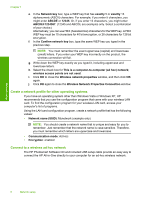
Network setup Chapter 1 NOTE: For optimal performance and security in your wireless network, use an access point (such as a wireless router) to connect the HP All-in-One. To change a USB connection to an integrated wireless WLAN 802.11 connection 1. Unplug the USB connection from the back of the product. 2. Insert the product CD in the computer CD-ROM drive. 3. Follow the onscreen instructions for a wireless network installation. 4. When the installation is complete, open Printers and Faxes (or Printers) in the Control Panel and delete the printers for the USB installation. For more detailed instructions on connecting the HP All-in-One to a network, see: • "Set up the HP All-in-One on an integrated wireless (WLAN 802.11) network" on page 2 • "Connect to a wireless ad hoc network" on page 6 Configure your firewall to work with HP products A personal firewall, which is security software running on your computer, can block network communication between your HP product and your computer. If you are having problems such as: • Printer not found when installing HP software • Unable to print, print job stuck in queue or printer goes offline • Scan communication errors or scanner busy messages • Unable to see printer status on your computer The firewall might be preventing your HP product from notifying computers on your network where it can be found. If the HP software cannot find the HP product during installation (and you know the HP product is on the network), or you have already successfully installed HP software and experience problems, try the following: 1. In the firewall configuration utility, look for an option to trust computers on the local subnet (sometimes called the "scope" or "zone"). By trusting all computers on the local subnet, computers and devices in your home can communicate with each other while still being protected from the internet. This is the easiest approach to use. 2. If you do not have the option to trust computers on the local subnet, add incoming UDP port 427 to your firewall's list of allowed ports. NOTE: Not all firewalls require you to differentiate between incoming and outgoing ports, but some do. Another common problem is that HP software is not trusted by your firewall to access the network. This can happen if you answered "block" to any firewall dialog boxes that appeared when you installed the HP software. If this occurs, check that the following programs are in your firewall's list of trusted applications; add any that are missing. • hpqkygrp.exe, located in C:\program files\HP\digital imaging\bin • hpqscnvw.exe, located in C:\program files\HP\digital imaging\bin • hpqste08.exe, located in C:\program files\HP\digital imaging\bin • hpqtra08.exe, located in C:\program files\HP\digital imaging\bin • hpqthb08.exe, located in C:\program files\HP\digital imaging\bin 8 Network setup
-
 1
1 -
2
-
3
-
4
-
 5
5 -
 6
6 -
 7
7 -
 8
8 -
 9
9 -
 10
10 -
 11
11 -
 12
12 -
 13
13 -
 14
14 -
 15
15 -
16
-
17
-
18
-
19
-
20
-
21
-
22
-
23
-
24
-
25
-
26
-
27
-
28
-
29
-
30
-
31
 |
 |