HP Photosmart C4524 Basic Guide - Page 7
What you need for an ad hoc network - wireless
 |
View all HP Photosmart C4524 manuals
Add to My Manuals
Save this manual to your list of manuals |
Page 7 highlights
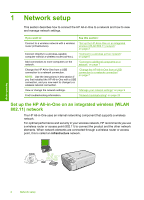
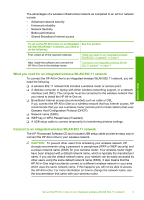
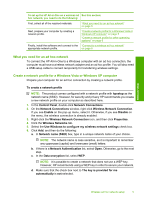
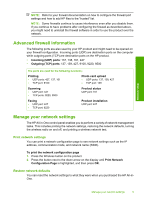
Network setup To set up the HP All-in-One on a wireless ad See this section: hoc network, you need to do the following: First, collect all of the required materials. "What you need for an ad hoc network" on page 5 Next, prepare your computer by creating a network profile. "Create a network profile for a Windows Vista or Windows XP computer" on page 5 "Create a network profile for other operating systems" on page 6 Finally, install the software and connect to the "Connect to a wireless ad hoc network" appropriate network profile. on page 6 What you need for an ad hoc network To connect the HP All-in-One to a Windows computer with an ad hoc connection, the computer must have a wireless network adapter and an ad hoc profile. You will also need a USB setup cable to connect temporarily for transferring wireless settings. Create a network profile for a Windows Vista or Windows XP computer Prepare your computer for an ad hoc connection by creating a network profile. To create a network profile NOTE: The product comes configured with a network profile with hpsetup as the network name (SSID). However, for security and privacy HP recommends you create a new network profile on your computer as described here. 1. In the Control Panel, double-click Network Connections. 2. On the Network Connections window, right-click Wireless Network Connection. If you see Enable on the pop-up menu, select it. Otherwise, if you see Disable on the menu, the wireless connection is already enabled. 3. Right-click the Wireless Network Connection icon, and then click Properties. 4. Click the Wireless Networks tab. 5. Select the Use Windows to configure my wireless network settings check box. 6. Click Add, and then do the following: a. In Network name (SSID) box, type in a unique network name of your choice. NOTE: The network name is case sensitive, so it is important to remember any uppercase (capital) and lowercase (small) letters. b. If there is a Network Authentication list, select Open. Otherwise, go to the next step. c. In the Data encryption list, select WEP. NOTE: It is possible to create a network that does not use a WEP key. However, HP recommends using a WEP key in order to secure your network. d. Make sure that the check box next to The key is provided for me automatically is not selected. Wireless ad hoc network setup 5
-
 1
1 -
 2
2 -
 3
3 -
 4
4 -
 5
5 -
 6
6 -
 7
7 -
 8
8 -
 9
9 -
 10
10 -
 11
11 -
 12
12 -
13
-
14
-
15
-
16
-
17
-
18
-
19
-
20
-
21
-
22
-
23
-
24
-
25
-
26
-
27
-
28
-
29
-
30
-
31
 |
 |