HP ProLiant ML110 ProLiant ML110 Generation 2 Server Maintenance and Service G - Page 27
HDD Cage, To install an HDD cage
 |
View all HP ProLiant ML110 manuals
Add to My Manuals
Save this manual to your list of manuals |
Page 27 highlights
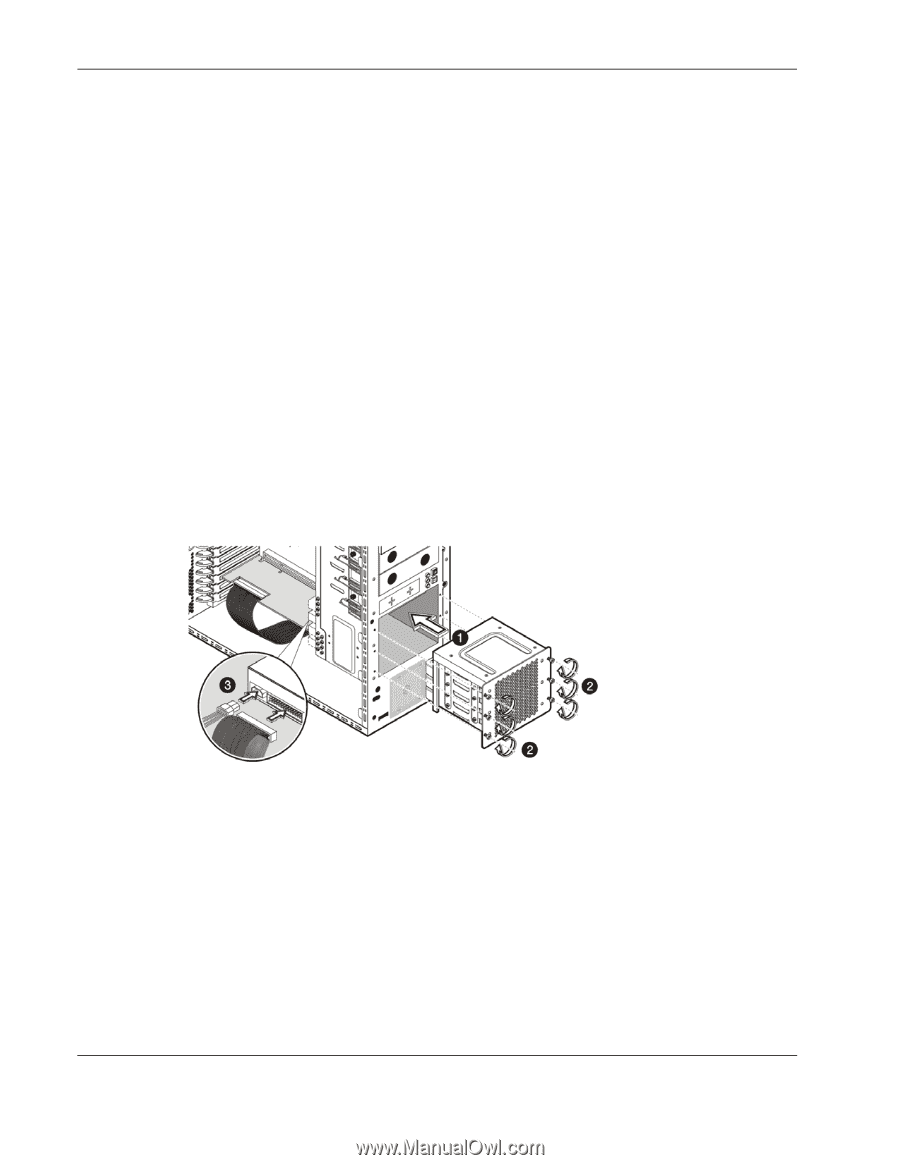
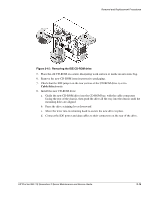
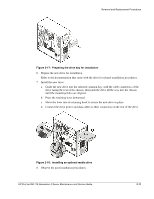
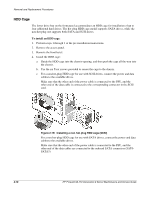
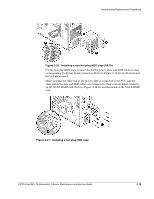
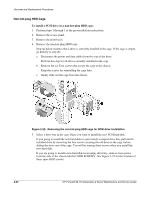
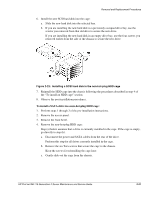
Removal and Replacement Procedures HDD Cage The lower drive bay on the front panel accommodates an HDD cage for installation of up to four additional hard drives. The hot-plug HDD cage model supports SATA drives, while the non-hot-plug one supports both SATA and SCSI drives. To install an HDD cage: 1. Perform steps 1 through 3 of the pre-installation instructions. 2. Remove the access panel. 3. Remove the front bezel. 4. Install the HDD cage: a. Guide the HDD cage into the chassis opening, and then push the cage all the way into the chassis. b. Use the six Torx screws provided to secure the cage to the chassis. c. For a non-hot-plug HDD cage for use with SCSI drives, connect the power and data cables to the available drives. Make sure that the other end of the power cable is connected to the PSU, and the other end of the data cable is connected to the corresponding connector in the SCSI card. Figure 2-19: Installing a non-hot-plug HDD cage (SCSI) For a non-hot-plug HDD cage for use with SATA drives, connect the power and data cables to the available drives. Make sure that the other end of the power cable is connected to the PSU, and the other end of the data cables are connected to the onboard SATA connectors (SAT0SATA3). 2-18 HP ProLiant ML110 Generation 2 Server Maintenance and Service Guide
-
 1
1 -
2
-
3
-
4
-
5
-
6
-
7
-
8
-
9
-
10
-
11
-
12
-
13
-
14
-
15
-
16
-
17
-
18
-
19
-
20
-
21
-
 22
22 -
 23
23 -
 24
24 -
 25
25 -
 26
26 -
 27
27 -
 28
28 -
 29
29 -
 30
30 -
 31
31 -
 32
32 -
33
-
34
-
35
-
36
-
37
-
38
-
39
-
40
-
41
-
42
-
43
-
44
-
45
-
46
-
47
-
48
-
49
-
50
-
51
-
52
-
53
-
54
-
55
-
56
-
57
-
58
-
59
-
60
-
61
-
62
-
63
-
64
-
65
-
66
-
67
-
68
-
69
-
70
-
71
-
72
-
73
-
74
-
75
-
76
-
77
-
78
-
79
-
80
-
81
-
82
-
83
-
84
-
85
-
86
-
87
-
88
-
89
-
90
-
91
-
92
-
93
-
94
-
95
-
96
-
97
-
98
 |
 |