HP ProLiant SL4545 HP ProLiant SL4500 Series Chassis Maintenance and Service G - Page 57
Midplane baffle
 |
View all HP ProLiant SL4545 manuals
Add to My Manuals
Save this manual to your list of manuals |
Page 57 highlights
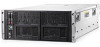
To replace the component, reverse the removal procedure. Be sure to align the midplane using the guides provided. When replacing the midplane cover, tilt it in toward the front of the chassis, and then down to align the screw holes. Midplane baffle To remove the component: 1. Remove the midplane assembly ("Midplane assembly (1 node chassis)" on page 49, "Midplane assembly (2 node chassis)" on page 53). 2. Remove the midplane baffle. To replace the component, reverse the removal procedure. Removal and replacement procedures 57
-
 1
1 -
2
-
3
-
4
-
5
-
6
-
7
-
8
-
9
-
10
-
11
-
12
-
13
-
14
-
15
-
16
-
17
-
18
-
19
-
20
-
21
-
22
-
23
-
24
-
25
-
26
-
27
-
28
-
29
-
30
-
31
-
32
-
33
-
34
-
35
-
36
-
37
-
38
-
39
-
40
-
41
-
42
-
43
-
44
-
45
-
46
-
47
-
48
-
49
-
50
-
51
-
 52
52 -
 53
53 -
 54
54 -
 55
55 -
 56
56 -
 57
57 -
 58
58 -
 59
59 -
 60
60 -
 61
61 -
 62
62 -
63
-
64
-
65
-
66
-
67
-
68
-
69
-
70
-
71
-
72
-
73
-
74
-
75
-
76
-
77
 |
 |

Removal and replacement procedures
57
To replace the component, reverse the removal procedure. Be sure to align the midplane using the guides
provided.
When replacing the midplane cover, tilt it in toward the front of the chassis, and then down to align the screw
holes.
Midplane baffle
To remove the component:
1.
Remove the midplane assembly ("
Midplane assembly (1 node chassis)
" on page
49
, "
Midplane
assembly (2 node chassis)
" on page
53
).
2.
Remove the midplane baffle.
To replace the component, reverse the removal procedure.