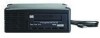
HP Q1581A HP StorageWorks DAT SCSI Tape Drives user guide (Q1573 - 90905, Febr - Page 30
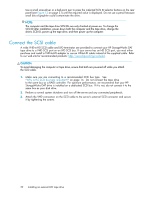
Connect the SCSI cable
 |
UPC - 882780612716
View all HP Q1581A manuals
Add to My Manuals
Save this manual to your list of manuals |
Page 30 highlights
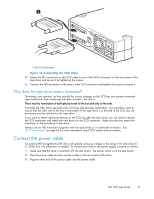
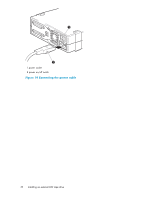
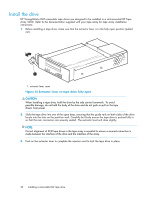
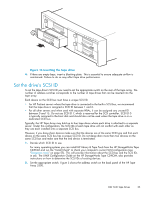
Use a small screwdriver or a ball-point pen to press the indented SCSI ID selector buttons on the rear panel (see Figure 13 on page 31) until the required value is displayed. Do not use a pencil because small bits of graphite could contaminate the drive. NOTE: The computer and the tape drive SCSI IDs are only checked at power-on. To change the SCSI ID after installation, power down both the computer and the tape drive, change the drive's SCSI ID, power up the tape drive, and then power up the computer. Connect the SCSI cable A wide VHD-to-HD SCSI cable and LVD terminator are provided to connect your HP StorageWorks DAT tape drive to a VHD SCSI port on an LVD SCSI bus. If your server has an HD SCSI port, you must either purchase and install a VHD-to-HD adapter or use an HD-to-HD cable instead of the supplied cable. Refer to our web site for recommended products: http://www.hp.com/go/connect. CAUTION: To avoid damaging the computer or tape drive, ensure that both are powered off while you attach the SCSI cable. 1. Make sure you are connecting to a recommended SCSI bus type. See "Why is the SCSI bus type important?" on page 14. Do not connect the tape drive to the same bus as a RAID controller. For optimum performance, we recommend that your HP StorageWorks DAT drive is installed on a dedicated SCSI bus. If it is not, do not connect it to the same bus as your disk drive. 2. Perform a normal system shutdown and turn off the server and any connected peripherals. 3. Attach the VHD connection on the SCSI cable to the server's external SCSI connector and secure it by tightening the screws. 30 Installing an external DAT tape drive
-
 1
1 -
2
-
3
-
4
-
5
-
6
-
7
-
8
-
9
-
10
-
11
-
12
-
13
-
14
-
15
-
16
-
17
-
18
-
19
-
20
-
21
-
22
-
23
-
24
-
 25
25 -
 26
26 -
 27
27 -
 28
28 -
 29
29 -
 30
30 -
 31
31 -
 32
32 -
 33
33 -
 34
34 -
 35
35 -
36
-
37
-
38
-
39
-
40
-
41
-
42
-
43
-
44
-
45
-
46
-
47
-
48
-
49
-
50
-
51
-
52
-
53
-
54
-
55
-
56
-
57
-
58
-
59
-
60
-
61
-
62
-
63
-
64
-
65
-
66
-
67
-
68
-
69
 |
 |
