HP SG3-200 Upgrading and Servicing Guide - Page 14
Removing the Primary Hard Disk Drive
 |
View all HP SG3-200 manuals
Add to My Manuals
Save this manual to your list of manuals |
Page 14 highlights
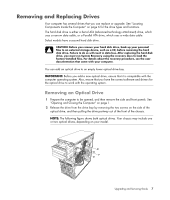
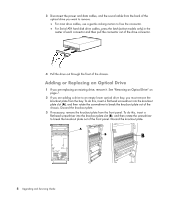
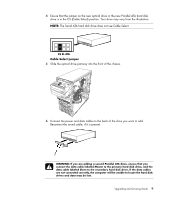
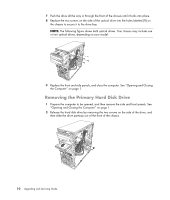
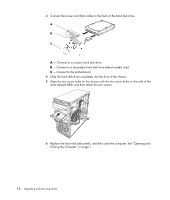
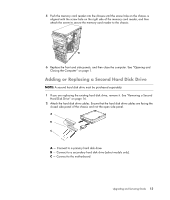
7 Push the drive all the way in through the front of the chassis until it locks into place. 8 Replace the two screws on the side of the optical drive into the holes labeled (1) on the chassis to secure it to the drive bay. NOTE: The following figure shows both optical drives. Your chassis may include one or two optical drives, depending on your model. . 9 Replace the front and side panels, and close the computer. See "Opening and Closing the Computer" on page 1. Removing the Primary Hard Disk Drive 1 Prepare the computer to be opened, and then remove the side and front panels. See "Opening and Closing the Computer" on page 1. 2 Release the hard disk drive by removing the two screws on the side of the drive, and then slide the drive partway out of the front of the chassis. 10 Upgrading and Servicing Guide
-
 1
1 -
2
-
3
-
4
-
5
-
6
-
7
-
8
-
 9
9 -
 10
10 -
 11
11 -
 12
12 -
 13
13 -
 14
14 -
 15
15 -
 16
16 -
 17
17 -
 18
18 -
 19
19 -
20
-
21
-
22
-
23
-
24
-
25
-
26
-
27
-
28
 |
 |
