HP SG3-200 Upgrading and Servicing Guide - Page 16
Align the two screw holes on the chassis with the two screw holes on the side of
 |
View all HP SG3-200 manuals
Add to My Manuals
Save this manual to your list of manuals |
Page 16 highlights
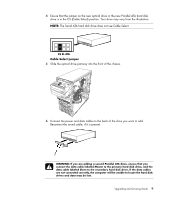
3 Connect the power and data cables to the back of the hard disk drive. A - Connect to a primary hard disk drive. B - Connect to a secondary hard disk drive (select models only). C - Connect to the motherboard. 4 Slide the hard disk drive completely into the front of the chassis. 5 Align the two screw holes on the chassis with the two screw holes on the side of the drive labeled HDD, and then attach the two screws. 6 Replace the front and side panels, and then close the computer. See "Opening and Closing the Computer" on page 1. 12 Upgrading and Servicing Guide
-
 1
1 -
2
-
3
-
4
-
5
-
6
-
7
-
8
-
9
-
10
-
 11
11 -
 12
12 -
 13
13 -
 14
14 -
 15
15 -
 16
16 -
 17
17 -
 18
18 -
 19
19 -
 20
20 -
 21
21 -
22
-
23
-
24
-
25
-
26
-
27
-
28
 |
 |
12
Upgrading and Servicing Guide
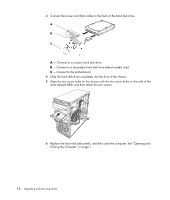
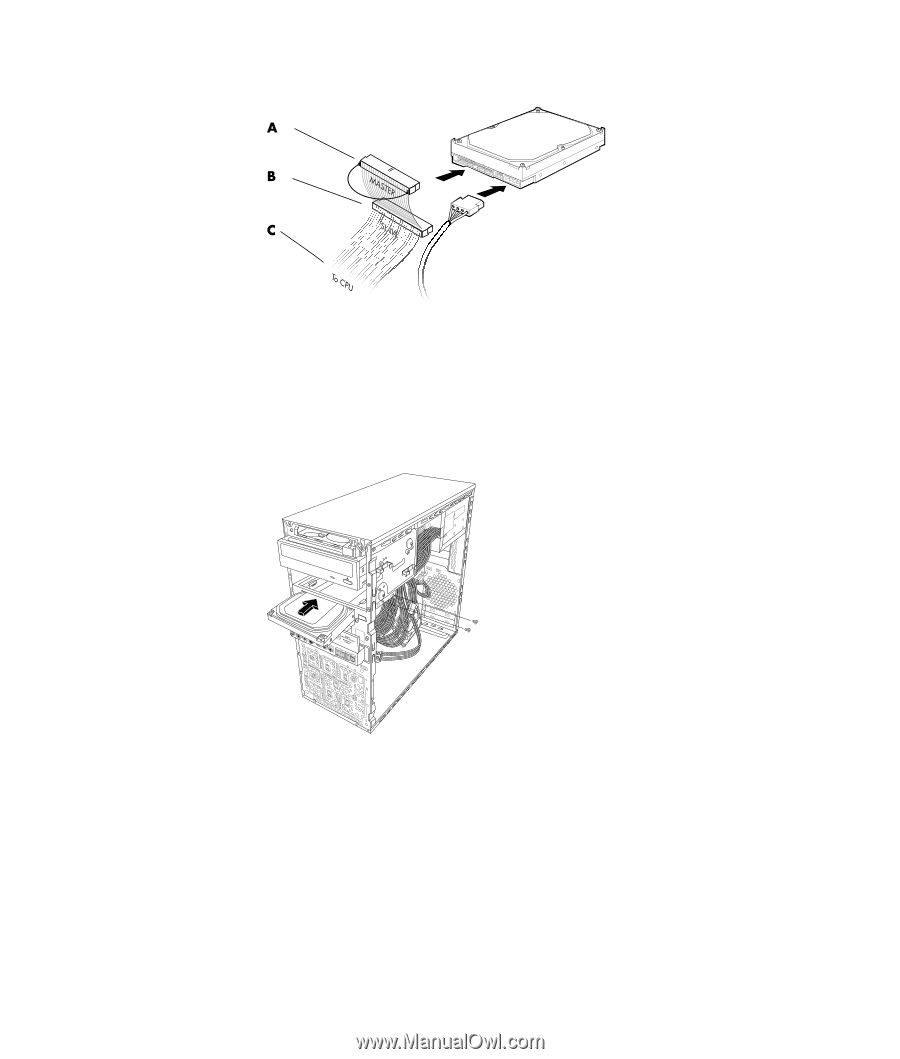
3
Connect the power and data cables to the back of the hard disk drive.
A
— Connect to a primary hard disk drive.
B
— Connect to a secondary hard disk drive (select models only).
C
— Connect to the motherboard.
4
Slide the hard disk drive completely into the front of the chassis.
5
Align the two screw holes on the chassis with the two screw holes on the side of the
drive labeled HDD, and then attach the two screws.
6
Replace the front and side panels, and then close the computer. See “Opening and
Closing the Computer” on page 1.