HP StorageWorks 9000s NAS 4000s and 9000s Administration Guide - Page 162
HP StorageWorks 9000s - NAS Manual
 |
View all HP StorageWorks 9000s manuals
Add to My Manuals
Save this manual to your list of manuals |
Page 162 highlights
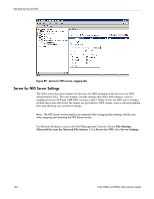
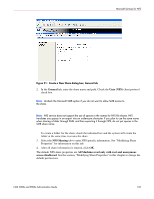
Microsoft Services for NFS Installing NFS Authentication Software on the Domain Controllers and Active Directory Domain Controllers The NFS Authentication software must be installed on all Primary Domain Controllers (PDCs) and backup domain controllers (BDCs) that have Windows users mapped to UNIX users. This includes Active Directory domains. For instructions on setting up user mappings, see "NFS User and Group Mappings." Note: If the authentication software is not installed on all domain controllers that have user name mappings, including Primary Domain Controllers, Backup Domain Controllers, and Active Directory Domains, then domain user name mappings will not work correctly. The Authentication software can be installed in two different ways- the Share method or CD method. To install the Authentication software on the domain controllers (Share Method): 1. Share out C:\hpnas\components\SFU 3.0. 2. Locate the setup.exe file located in the SFU 3.0 directory of the NAS server. 3. On the domain controller where the Authentication software is being installed use Windows Explorer to: a. Open the shared directory containing setup.exe. b. Double-click the file to open it. Windows Installer is opened. Note: If the domain controller used does not have Windows Installer installed, locate the file InstMSI.exe on the SFU 3.0 directory and run it. After this installation, the Windows Installer program starts when opening setup.exe. 4. In the Microsoft Windows Services for UNIX Setup Wizard dialog box, click Next. 5. In the User name box, type your name. If the name of your organization does not appear in the Organization box, type the name of your organization there. 6. In the CD Key boxes, type the product key found on the back of the CD-ROM case that is included with the NAS server software, and then click Next. 7. Read the End User License Agreement carefully. If you accept the terms of the agreement, click I accept the terms in the License Agreement, and then click Next to continue installation. If you click I do not accept the License Agreement (Exit Setup), the installation procedure terminates. 8. Click Custom Installation, and then click Next. 9. In the Components pane, click the down arrow next to Windows Services for UNIX, and then click Entire component will not be available. 10. Click the plus sign (+) next to Authentication Tools. 11. In the Components pane, click the plus sign (+) next to Authentication Tools. 12. Click Server for NFS Authentication, click Will be installed on local hard drive, and then click Next. 13. Follow the remaining instructions in the Wizard. 162 NAS 4000s and 9000s Administration Guide
-
 1
1 -
2
-
3
-
4
-
5
-
6
-
7
-
8
-
9
-
10
-
11
-
12
-
13
-
14
-
15
-
16
-
17
-
18
-
19
-
20
-
21
-
22
-
23
-
24
-
25
-
26
-
27
-
28
-
29
-
30
-
31
-
32
-
33
-
34
-
35
-
36
-
37
-
38
-
39
-
40
-
41
-
42
-
43
-
44
-
45
-
46
-
47
-
48
-
49
-
50
-
51
-
52
-
53
-
54
-
55
-
56
-
57
-
58
-
59
-
60
-
61
-
62
-
63
-
64
-
65
-
66
-
67
-
68
-
69
-
70
-
71
-
72
-
73
-
74
-
75
-
76
-
77
-
78
-
79
-
80
-
81
-
82
-
83
-
84
-
85
-
86
-
87
-
88
-
89
-
90
-
91
-
92
-
93
-
94
-
95
-
96
-
97
-
98
-
99
-
100
-
101
-
102
-
103
-
104
-
105
-
106
-
107
-
108
-
109
-
110
-
111
-
112
-
113
-
114
-
115
-
116
-
117
-
118
-
119
-
120
-
121
-
122
-
123
-
124
-
125
-
126
-
127
-
128
-
129
-
130
-
131
-
132
-
133
-
134
-
135
-
136
-
137
-
138
-
139
-
140
-
141
-
142
-
143
-
144
-
145
-
146
-
147
-
148
-
149
-
150
-
151
-
152
-
153
-
154
-
155
-
156
-
 157
157 -
 158
158 -
 159
159 -
 160
160 -
 161
161 -
 162
162 -
 163
163 -
 164
164 -
 165
165 -
 166
166 -
 167
167 -
168
-
169
-
170
-
171
-
172
-
173
-
174
-
175
-
176
-
177
-
178
-
179
-
180
-
181
-
182
-
183
-
184
-
185
-
186
-
187
-
188
-
189
-
190
-
191
-
192
-
193
-
194
-
195
-
196
-
197
-
198
-
199
-
200
-
201
-
202
-
203
-
204
-
205
-
206
-
207
-
208
-
209
-
210
-
211
-
212
-
213
-
214
-
215
-
216
-
217
-
218
-
219
-
220
-
221
-
222
-
223
-
224
-
225
-
226
-
227
-
228
-
229
-
230
-
231
-
232
-
233
-
234
-
235
-
236
-
237
-
238
-
239
-
240
-
241
-
242
-
243
-
244
-
245
-
246
 |
 |