HP StorageWorks 9000s NAS 4000s and 9000s Administration Guide - Page 208
Cluster Installation, Setting Up Networks
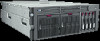 |
View all HP StorageWorks 9000s manuals
Add to My Manuals
Save this manual to your list of manuals |
Page 208 highlights
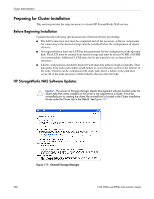
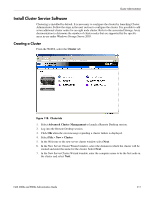
Cluster Administration Cluster Installation During the installation process, nodes will be shut down and rebooted. These steps are necessary to guarantee that the data on disks that are attached to the shared storage bus is not lost or corrupted. This can happen when multiple nodes try to simultaneously write to the same disk that is not yet protected by the cluster software. Use Table 14 to determine which nodes and storage devices should be presented during each step. Table 14: Power Sequencing for Cluster Installation Step Setting Up Networks Node 1 On Additional Nodes On Storage Not Presented Setting up On Off Shared Disks Presented Verifying Disk Off On Configuration Presented Configuring the On Off First Node Configuring On On additional Nodes Presented Presented Post-installation On On Presented Comments Verify that all storage devices on the shared bus are not presented. Power on all nodes. Shutdown all nodes. Present the shared storage, then power on the first node. Shut down first node, power on next node. Repeat this process for all cluster nodes. Shutdown all nodes; power on the first node. Power on the next node after the first node is successfully configured. Complete this process for all cluster nodes. At this point all cluster nodes should be on. To configure the Cluster service on the HP StorageWorks NAS server, an account must have administrative permissions on each node. All nodes must be member servers within the same domain. It is not acceptable to have a mix of domain controllers and member servers in a cluster. Setting Up Networks Each cluster node requires at least two network adapters-one to connect to a public network, and one to connect to a private network consisting of cluster nodes only. The private network adapter establishes node-to-node communication, cluster status signals, and cluster management. Each node's public network adapter connects the cluster to the public network where clients reside. Verify that all network connections are correct, with private network adapters connected to other private network adapters only, and public network adapters connected to the public network. 208 NAS 4000s and 9000s Administration Guide
-
 1
1 -
2
-
3
-
4
-
5
-
6
-
7
-
8
-
9
-
10
-
11
-
12
-
13
-
14
-
15
-
16
-
17
-
18
-
19
-
20
-
21
-
22
-
23
-
24
-
25
-
26
-
27
-
28
-
29
-
30
-
31
-
32
-
33
-
34
-
35
-
36
-
37
-
38
-
39
-
40
-
41
-
42
-
43
-
44
-
45
-
46
-
47
-
48
-
49
-
50
-
51
-
52
-
53
-
54
-
55
-
56
-
57
-
58
-
59
-
60
-
61
-
62
-
63
-
64
-
65
-
66
-
67
-
68
-
69
-
70
-
71
-
72
-
73
-
74
-
75
-
76
-
77
-
78
-
79
-
80
-
81
-
82
-
83
-
84
-
85
-
86
-
87
-
88
-
89
-
90
-
91
-
92
-
93
-
94
-
95
-
96
-
97
-
98
-
99
-
100
-
101
-
102
-
103
-
104
-
105
-
106
-
107
-
108
-
109
-
110
-
111
-
112
-
113
-
114
-
115
-
116
-
117
-
118
-
119
-
120
-
121
-
122
-
123
-
124
-
125
-
126
-
127
-
128
-
129
-
130
-
131
-
132
-
133
-
134
-
135
-
136
-
137
-
138
-
139
-
140
-
141
-
142
-
143
-
144
-
145
-
146
-
147
-
148
-
149
-
150
-
151
-
152
-
153
-
154
-
155
-
156
-
157
-
158
-
159
-
160
-
161
-
162
-
163
-
164
-
165
-
166
-
167
-
168
-
169
-
170
-
171
-
172
-
173
-
174
-
175
-
176
-
177
-
178
-
179
-
180
-
181
-
182
-
183
-
184
-
185
-
186
-
187
-
188
-
189
-
190
-
191
-
192
-
193
-
194
-
195
-
196
-
197
-
198
-
199
-
200
-
201
-
202
-
 203
203 -
 204
204 -
 205
205 -
 206
206 -
 207
207 -
 208
208 -
 209
209 -
 210
210 -
 211
211 -
 212
212 -
 213
213 -
214
-
215
-
216
-
217
-
218
-
219
-
220
-
221
-
222
-
223
-
224
-
225
-
226
-
227
-
228
-
229
-
230
-
231
-
232
-
233
-
234
-
235
-
236
-
237
-
238
-
239
-
240
-
241
-
242
-
243
-
244
-
245
-
246
 |
 |
