HP StorageWorks 9000s NAS 4000s and 9000s Administration Guide - Page 212
Adding Nodes to a Cluster, Re-analyze, Finish, Cluster, Cluster Nodes
 |
View all HP StorageWorks 9000s manuals
Add to My Manuals
Save this manual to your list of manuals |
Page 212 highlights
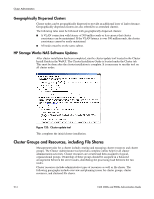
Cluster Administration The next step runs a pre-configuration analysis. This procedure analyzes and verifies the hardware and software configuration and identifies potential problems. A comprehensive and easy-to-read report will be created listing any potential configuration issues before the cluster is created. 1. Select the details tab to see a list of the items analyzed and any potential issues there may be with the cluster configuration. 2. If there are any issues fix the issues with the suggestion provided in the details tab and then select Re-analyze. Some issues that may occur are: ■ No shared disk for the Quorum disk. A shared disk must be created with a NTFS partition at least 50 MB in size ■ Use of DHCP addresses for network connections. All Network adapters must be configured with static IP addresses in a cluster configuration ■ Service for Macintosh and Service for NetWare are not supported in a cluster configuration ■ Dynamic Disks are not supported in a cluster configuration ■ Errors will appear on a network adapter that is not configured or does not have an active link. If the network adapter is not going to be used it should be disabled 3. After all issues have been resolved click Next to continue. 4. In the New Server Cluster Wizard window, enter the Cluster IP address and click Next. 5. In the New Server Cluster Wizard window, enter the login information for the domain account under which the cluster service will be run. Click Next. 6. In the New Server Cluster Wizard window, review the proposed cluster configuration and click Next. Note: It is possible to change the Quorum disk by selecting the Quorum button. This will display a list of available disks that can be used for the Quorum disk. Select the appropriate disk and select OK to continue. 7. In the New Server Cluster Wizard window, select Next to create the cluster. After configuration is complete the following message is displayed: You have successfully completed the New Server Cluster Wizard. Click Finish to close the wizard. Adding Nodes to a Cluster Note: Only the Quorum disk should be accessible by the new node. The new node should not have access to the LUNs in the cluster until after it has joined the cluster. After the node has joined the cluster, the LUNs may be presented to the new node. Move the physical disk resources over to the new node to confirm functionality. 1. Connect to the WebUI of a node that is a member of the cluster. Select the Cluster tab, and then select Cluster Nodes. 212 NAS 4000s and 9000s Administration Guide
-
 1
1 -
2
-
3
-
4
-
5
-
6
-
7
-
8
-
9
-
10
-
11
-
12
-
13
-
14
-
15
-
16
-
17
-
18
-
19
-
20
-
21
-
22
-
23
-
24
-
25
-
26
-
27
-
28
-
29
-
30
-
31
-
32
-
33
-
34
-
35
-
36
-
37
-
38
-
39
-
40
-
41
-
42
-
43
-
44
-
45
-
46
-
47
-
48
-
49
-
50
-
51
-
52
-
53
-
54
-
55
-
56
-
57
-
58
-
59
-
60
-
61
-
62
-
63
-
64
-
65
-
66
-
67
-
68
-
69
-
70
-
71
-
72
-
73
-
74
-
75
-
76
-
77
-
78
-
79
-
80
-
81
-
82
-
83
-
84
-
85
-
86
-
87
-
88
-
89
-
90
-
91
-
92
-
93
-
94
-
95
-
96
-
97
-
98
-
99
-
100
-
101
-
102
-
103
-
104
-
105
-
106
-
107
-
108
-
109
-
110
-
111
-
112
-
113
-
114
-
115
-
116
-
117
-
118
-
119
-
120
-
121
-
122
-
123
-
124
-
125
-
126
-
127
-
128
-
129
-
130
-
131
-
132
-
133
-
134
-
135
-
136
-
137
-
138
-
139
-
140
-
141
-
142
-
143
-
144
-
145
-
146
-
147
-
148
-
149
-
150
-
151
-
152
-
153
-
154
-
155
-
156
-
157
-
158
-
159
-
160
-
161
-
162
-
163
-
164
-
165
-
166
-
167
-
168
-
169
-
170
-
171
-
172
-
173
-
174
-
175
-
176
-
177
-
178
-
179
-
180
-
181
-
182
-
183
-
184
-
185
-
186
-
187
-
188
-
189
-
190
-
191
-
192
-
193
-
194
-
195
-
196
-
197
-
198
-
199
-
200
-
201
-
202
-
203
-
204
-
205
-
206
-
 207
207 -
 208
208 -
 209
209 -
 210
210 -
 211
211 -
 212
212 -
 213
213 -
 214
214 -
 215
215 -
 216
216 -
 217
217 -
218
-
219
-
220
-
221
-
222
-
223
-
224
-
225
-
226
-
227
-
228
-
229
-
230
-
231
-
232
-
233
-
234
-
235
-
236
-
237
-
238
-
239
-
240
-
241
-
242
-
243
-
244
-
245
-
246
 |
 |