HP TouchSmart 310-1033 Upgrading and Servicing - Page 25
Removing and replacing a Computer Stand
 |
View all HP TouchSmart 310-1033 manuals
Add to My Manuals
Save this manual to your list of manuals |
Page 25 highlights
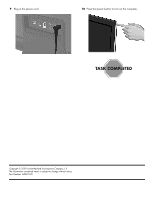
Removing and replacing a Computer Stand HP TouchSmart310 Computer features may vary by model. Before You Begin Observe the following requirements before removing and replacing the stand. WARNING: Never open the cover with the power cord attached or power applied. You may damage your computer. Avoid touching sharp edges inside the computer. CAUTION: Static electricity can damage the electronic components inside the computer. Discharge static electricity by touching the metal cage of the computer before touching any internal parts or electronic components. Tools Needed Flathead/Torx screwdriver #15 Small screws are easily lost. Remove screws over a surface that allows you to retrieve them if they fall.
-
 1
1 -
2
-
3
-
4
-
5
-
6
-
7
-
8
-
9
-
10
-
11
-
12
-
13
-
14
-
15
-
16
-
17
-
18
-
19
-
 20
20 -
 21
21 -
 22
22 -
 23
23 -
 24
24 -
 25
25 -
 26
26 -
 27
27 -
 28
28 -
 29
29
 |
 |

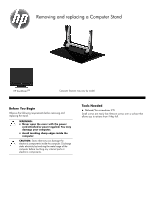
Removing and replacing a Computer Stand
HP TouchSmart
310
Computer features may vary by model.
Before You Begin
Observe the following requirements before removing and
replacing the stand.
Tools Needed
Flathead/Torx screwdriver #15
Small screws are easily lost. Remove screws over a surface that
allows you to retrieve them if they fall.
WARNING:
Never open the cover with the power
cord attached or power applied. You may
damage your computer.
Avoid touching sharp edges inside the
computer.
CAUTION:
Static electricity can damage the
electronic components inside the computer. Discharge
static electricity by touching the metal cage of the
computer before touching any internal parts or
electronic components.