HP Vectra VEi8 HP Vectra VLi8, 3 COM Etherlink III ISA 10BT Card, Installatio - Page 23
Click on the IntranetWare tab of the Novell IntranetWare Client Services
 |
View all HP Vectra VEi8 manuals
Add to My Manuals
Save this manual to your list of manuals |
Page 23 highlights
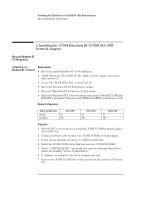
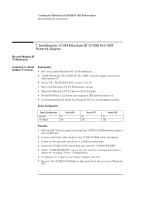
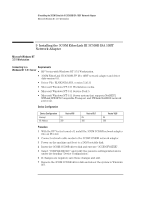
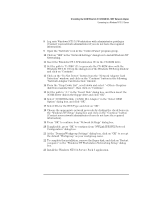
7 Installing the 3COM EtherLink III 3C509B ISA 10BT Network Adapter Connecting to a Novell NetWare 3.12 Server 26 Specify your Computer Name, Workgroup or Domain (Contact your network administrator if you do not have the required information) and click on "Next". 27 Click on "Finish" to complete the installation. 28 Remove the 3Com driver disk from the floppy drive and select "Yes" at the prompt to shut down and restart your computer for the new settings to take effect. 29 Log onto Windows NT4 Workstation with administrator privileges. 30 From the location of the "Novell IntranetWare Client v.4.11b" installation files, execute "Setupnw.exe". 31 Click on "Continue" to continue with the Novell IntranetWare Client installation. 32 Click on "Yes" to agree to the Software License Agreement to begin installation. 33 Click on the "Reboot" button at the completion of the Novell NetWare Client installation to restart the machine for changes to take effect. 34 Click on the "IntranetWare" tab of the Novell IntranetWare Client Services Login screen. 35 Select "Bindery Login" and specify the Server Name (Contact your network administrator if you do not have the required information). 36 Click on the "Login" tab and specify your Name and Password to login. 37 Install the Windows NT4 Service Pack 4 application to correct the error messages in the Event Viewer. 38 Install the Hewlett-Packard Soft Power Down application once the Service Pack 4 has been installed.
-
 1
1 -
2
-
3
-
4
-
5
-
6
-
7
-
8
-
9
-
10
-
11
-
12
-
13
-
14
-
15
-
16
-
17
-
 18
18 -
 19
19 -
 20
20 -
 21
21 -
 22
22 -
 23
23 -
 24
24 -
 25
25 -
 26
26 -
 27
27 -
 28
28 -
29
-
30
-
31
-
32
-
33
-
34
-
35
-
36
-
37
-
38
-
39
 |
 |