HP Vectra XU 6/XXX HP Vectra XU 6/XXX - Installing an Operating System, D3538- - Page 11
Windows 95 Setup Wizard, Finishing Setup, Finish, Setup, detected a disk in your floppy disk drive
 |
View all HP Vectra XU 6/XXX manuals
Add to My Manuals
Save this manual to your list of manuals |
Page 11 highlights
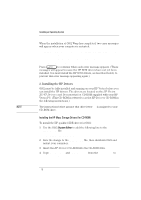
Installing an Operating System Installing Windows 95 1 Install Windows 95 from the Windows 95 (for PCs without Windows) installation disks. 2 When the Windows 95 Setup Wizard asks you to indicate what hardware is installed in your computer, click on the checkbox to indicate a CDROM drive is installed. Do not indicate that a network adapter or sound card are installed. 3 When the Windows 95 Setup Wizard displays the Finishing Setup dialog box, remove the Windows 95 diskette as requested by the setup program. Do not click the Finish button. 4 Insert the duplicate "XU/VT Boot" diskette in the flexible disk drive and insert the "XU/VT Drivers and Documentation" CD-ROM in the CD-ROM drive. Click the Finish button. 5 Do not remove the HP disk and CD-ROM when the message Setup detected a disk in your floppy disk drive appears. Click OK to restart your computer. 6 Your PC will start (boot) from the duplicate "XU/VT Boot" diskette. 7 Select the option for Windows 95 for PCs without Windows from the menu. 8 Select the option Windows 95 is installed. The SCSI drivers will be copied from the "XU/VT Drivers and Documentation" CD-ROM to your hard disk. 9 When the files have been copied, remove the diskette and the CDROM, then restart your PC. 10 When your PC restarts, Windows 95 will display a message to indicate that it is starting for the first time. 11 Windows 95 will ask you to insert certain Windows 95 diskettes as it completes the installation. Windows 95 will restart again when it has finished copying files from these diskettes. 11
-
 1
1 -
2
-
3
-
4
-
5
-
 6
6 -
 7
7 -
 8
8 -
 9
9 -
 10
10 -
 11
11 -
 12
12 -
 13
13 -
 14
14 -
 15
15 -
 16
16 -
17
-
18
-
19
-
20
 |
 |