HP Vectra XU 6/XXX HP Vectra XU 6/XXX - Installing an Operating System, D3538- - Page 12
MGA Change Display Wizard
 |
View all HP Vectra XU 6/XXX manuals
Add to My Manuals
Save this manual to your list of manuals |
Page 12 highlights
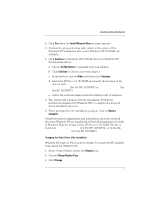
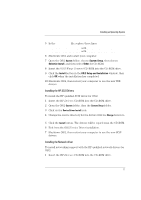
NOTE Installing an Operating System 2. Installing the HP Drivers Windows 95 must be fully installed and running on your HP Vectra before you can install the HP drivers. The drivers are located on the HP Vectra XU/VT Drivers and Documentation CD-ROM supplied with your HP Vectra PC. (This CD-ROM is referred to as the HP Drivers CD-ROM in the following instructions.) The instructions below assume that drive letter D: is assigned to your CD-ROM drive. Installing the MGA Video Driver 1 Insert the HP Drivers CD-ROM in the CD-ROM drive. 2 Double-click on the My Computer icon on the Windows 95 desktop. 3 Double-click on the CD-ROM drive icon, then on the Video folder, then on the folder named Disk 6. 4 Execute the file named Setup (to start the MGA Millennium PowerDesk Setup). 5 Click on the Next button to accept the default destination path. 6 Click on the Next button to confirm the installation of Quick Access and the MGA Monitor Program. 7 Select your language then click on the Next button. 8 Click OK in the Information . . . window. 9 Click Yes in the next dialog box, when asked to use the Windows 95 monitor mechanism. 10 Click OK when a message explains that the driver has been installed. 11 Click on the Start button of the MGA Change Display Wizard. 12 Click on the Settings tab in the Display Properties folder. 13 Click on Change Display Type. 14 Click on Change of the Adapter Type (the adapter will have been incorrectly detected as "Oak Technology Super VGA"). 12
-
 1
1 -
2
-
3
-
4
-
5
-
6
-
 7
7 -
 8
8 -
 9
9 -
 10
10 -
 11
11 -
 12
12 -
 13
13 -
 14
14 -
 15
15 -
 16
16 -
 17
17 -
18
-
19
-
20
 |
 |