HP Vectra XU 6/XXX HP Vectra XU 6/XXX - Installing an Operating System, D3538- - Page 18
OS/2 Warp Connect CD-ROM and then click
 |
View all HP Vectra XU 6/XXX manuals
Add to My Manuals
Save this manual to your list of manuals |
Page 18 highlights
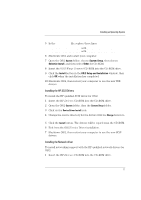
Installing an Operating System 2 Open the OS/2 System folder, then open the OS/2 Warp Connect Install/Remove folder. 3 Click on Warp Connect Selective Install for Networking. 4 Select an installation on this workstation (local install). 5 Follow the instructions displayed by the installation program. 6 Click on the Other Adapter button, when the Select Network Adapter dialog box appears. 7 Specify the location of the driver with D:\LAN\IBM\OS2 (for the HP 10/100VG) or D:\LANBT\IBM\OS2 (for the HP 10/100BT), when asked for the file location, and click OK. 8 Select the network adapter from the list displayed in the Drivers Found dialog box. Select Ethernet as the Type of LAN. 9 When the Select Network Adapter dialog box appears, the HP network adapter you selected is highlighted in the adapter list. 10 Remove the HP Drivers CD-ROM from the CD-ROM drive, insert the OS/2 Warp Connect CD-ROM and then click OK. 11 Click OK in the Select Network Adapter dialog box, to accept the selection of the adapter. 12 Click OK, then click OK again in the configuration dialog box. 13 Click the Install button in the Ready to Install window. 14 Select OK to confirm the shutdown of the operating system. Leave the OS/2 Warp Connect CD-ROM in the drive (some files will be copied from the CD-ROM when the operating system restarts). Detailed technical explanations and information about the network driver for OS/2 are supplied in a Network Administrator's Guide in Windows Help file format on the HP Drivers CD-ROM. The file is located in \LAN\DOC\NAG.HLP (for the HP 10/100VG), or in the file \LANBT\DOC\NAG.HLP (for the HP 10/100BT). 18
-
 1
1 -
2
-
3
-
4
-
5
-
6
-
7
-
8
-
9
-
10
-
11
-
12
-
 13
13 -
 14
14 -
 15
15 -
 16
16 -
 17
17 -
 18
18 -
 19
19 -
 20
20
 |
 |
