HP dc73 HP Blade Workstation Client series - Embedded OS Version 9.xx - Page 40
At this point, the bootable image file is on the USB key
 |
View all HP dc73 manuals
Add to My Manuals
Save this manual to your list of manuals |
Page 40 highlights
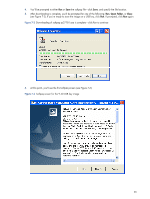
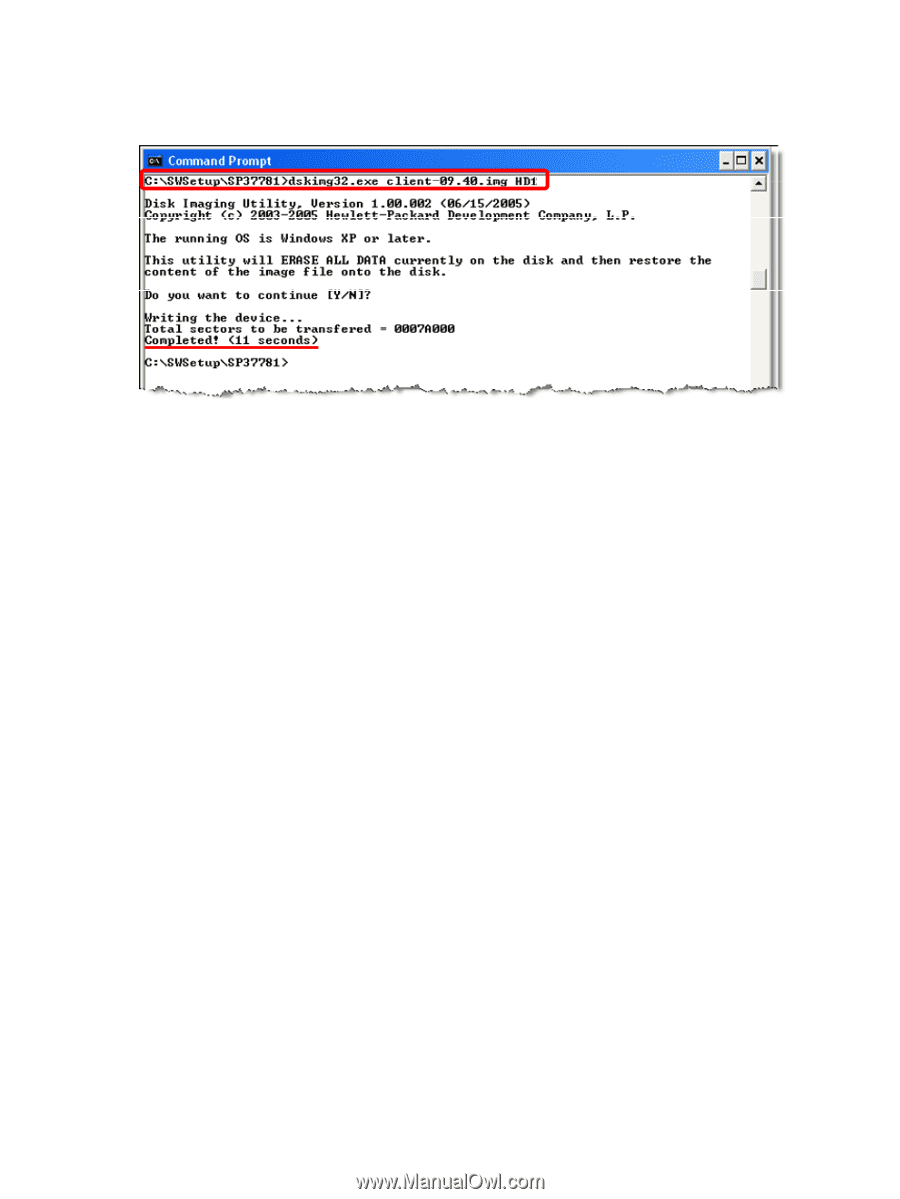
9. To copy the image file to the USB key, run dskimg32.exe, with the image file name and the USB hard drive parameters (HD1 in this case; see Figure 7-6). Figure 7-6 Copying of the 9.40 image file to the USB key At this point, the bootable image file is on the USB key, and the USB key can be removed from the Windows computer. 40
-
 1
1 -
2
-
3
-
4
-
5
-
6
-
7
-
8
-
9
-
10
-
11
-
12
-
13
-
14
-
15
-
16
-
17
-
18
-
19
-
20
-
21
-
22
-
23
-
24
-
25
-
26
-
27
-
28
-
29
-
30
-
31
-
32
-
33
-
34
-
 35
35 -
 36
36 -
 37
37 -
 38
38 -
 39
39 -
 40
40 -
 41
41 -
 42
42 -
 43
43 -
 44
44 -
 45
45 -
46
-
47
-
48
-
49
-
50
-
51
-
52
-
53
-
54
-
55
-
56
-
57
-
58
-
59
-
60
 |
 |
40
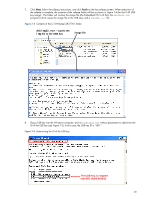
9.
To copy the image file to the USB key, run
dskimg32.exe
, with the image file name and the USB hard
drive parameters (HD1 in this case; see Figure 7-6).
Figure 7-6
Copying of the 9.40 image file to the USB key
At this point, the bootable image file is on the USB key, and the USB key can be removed from the Windows
computer.