HP dc73 HP Blade Workstation Client series - Embedded OS Version 9.xx - Page 43
Static networking, Enter, Altiris Server Address,
 |
View all HP dc73 manuals
Add to My Manuals
Save this manual to your list of manuals |
Page 43 highlights
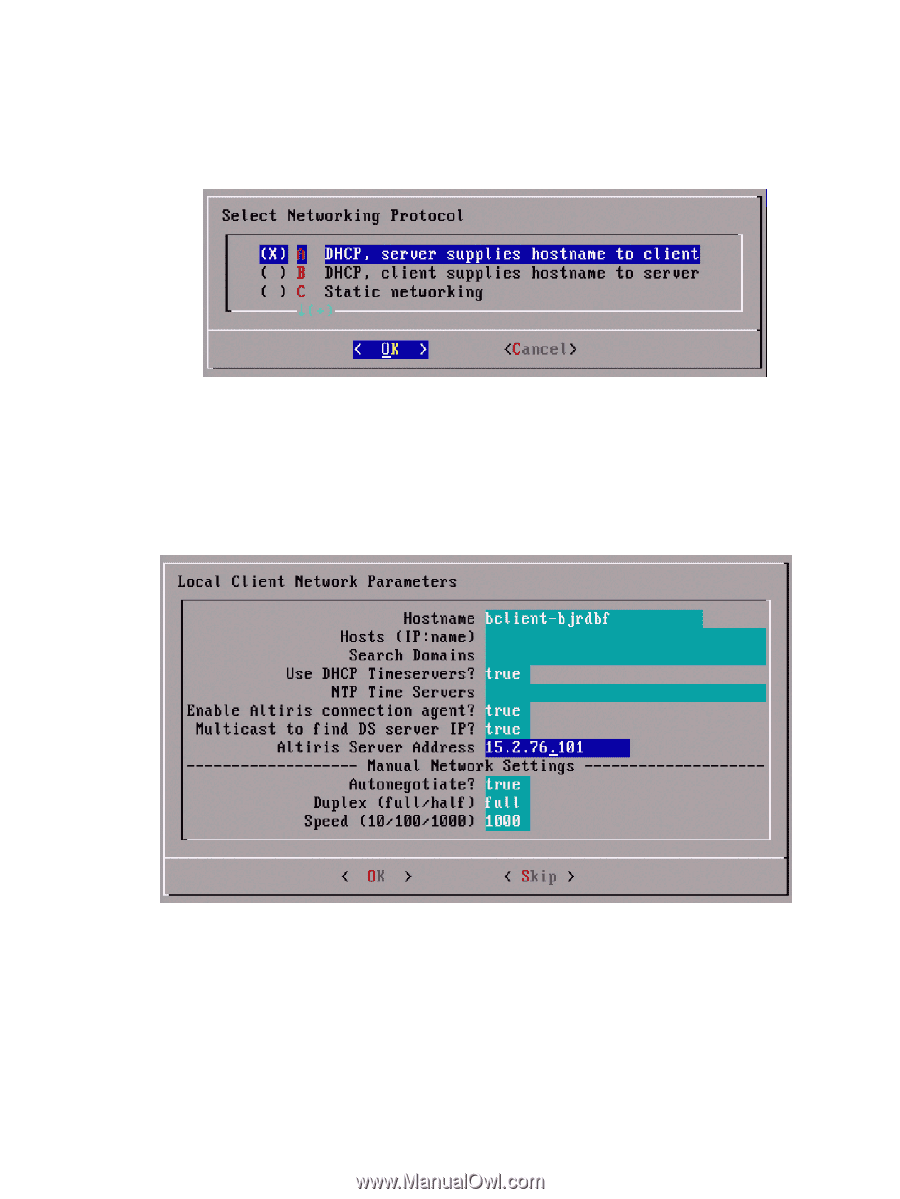
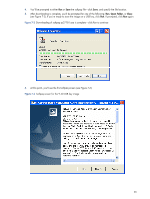
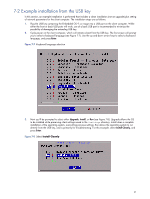
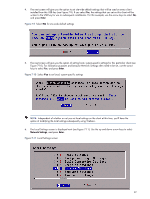
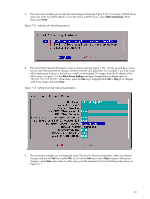
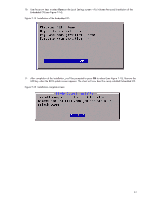
7. The next screen enables you to select the networking protocol (see Figure 7-12). If you have a DHCP server, select one of the two DHCP options. If you don't have a DHCP server, select Static networking. When done, press Enter. Figure 7-12 Selection of networking protocol 8. The Local Client Network Parameters screen is shown next (see Figure 7-13). Use the up and down arrow keys to select the parameter to change, and then enter the new parameter. For example, if you'll be using Altiris Deployment Solution in the future to install new Embedded OS images, enter the IP address of the Altiris server. In Figure 7-13, the Altiris Server Address has been changed from its default value of 127.0.0.1 to 15.2.76.101. When done, press the Tab key to highlight either OK or Skip (if no changes need to be made), and press Enter. Figure 7-13 Setting local client network parameters 9. The next screen enables you to change the Local Client Active Directory Parameters. Make any desired changes and use the Tab key to select OK, or just use the Tab key to select Skip to bypass making any changes-press Enter when done. In either case, you'll be returned to the Local Settings screen shown in Figure 7-11. 43
-
 1
1 -
2
-
3
-
4
-
5
-
6
-
7
-
8
-
9
-
10
-
11
-
12
-
13
-
14
-
15
-
16
-
17
-
18
-
19
-
20
-
21
-
22
-
23
-
24
-
25
-
26
-
27
-
28
-
29
-
30
-
31
-
32
-
33
-
34
-
35
-
36
-
37
-
 38
38 -
 39
39 -
 40
40 -
 41
41 -
 42
42 -
 43
43 -
 44
44 -
 45
45 -
 46
46 -
 47
47 -
 48
48 -
49
-
50
-
51
-
52
-
53
-
54
-
55
-
56
-
57
-
58
-
59
-
60
 |
 |