HP mp3222 HP mp3220 series digital projector - User's Guide - Page 17
To set up on a table, Setup > Projector, position., Front Table
 |
View all HP mp3222 manuals
Add to My Manuals
Save this manual to your list of manuals |
Page 17 highlights
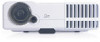
Setting Up If you do not want to use the distance table, you can use the following equations to help determine where to install the projector relative to the screen. Calculating projection dimensions distance from lens to screen = A × width of screen minimum and maximum distance from screen = B width of screen = 0.8 × diagonal of screen (for 4:3 screen) projector lens below bottom of screen = C × width of screen (for 4:3 screen) A = 2.0 to 2.4 B = 1.2 to 12 m (4 to 40 ft) C = 0.11 to 0.42 To set up on a table 1. Place the projector on a stable platform located 1.2 to 12 m (4 to 40 ft) in front of the screen. Ideally, the platform should be lower than the bottom of the screen. 2. Connect one end of the power cord to the side of the projector and the other end to an electrical outlet. 3. When you first turn on the projector, if the image is upside-down or backward, you should change a menu setting. Open the on-screen menu (see "To change settings using the on-screen menu" on page 37) and select Setup > Projector position. Then choose Front Table from the drop-down list-this is the default setting. If you want to permanently install the projector on the ceiling or behind the screen, see "Installing the Projector" on page 49. User's Guide 17
-
 1
1 -
2
-
3
-
4
-
5
-
6
-
7
-
8
-
9
-
10
-
11
-
 12
12 -
 13
13 -
 14
14 -
 15
15 -
 16
16 -
 17
17 -
 18
18 -
 19
19 -
 20
20 -
 21
21 -
 22
22 -
23
-
24
-
25
-
26
-
27
-
28
-
29
-
30
-
31
-
32
-
33
-
34
-
35
-
36
-
37
-
38
-
39
-
40
-
41
-
42
-
43
-
44
-
45
-
46
-
47
-
48
-
49
-
50
-
51
-
52
-
53
-
54
-
55
-
56
-
57
-
58
-
59
-
60
-
61
-
62
-
63
-
64
-
65
-
66
-
67
-
68
-
69
-
70
-
71
-
72
-
73
-
74
-
75
-
76
-
77
-
78
 |
 |
