Hitachi CMP4221U Owners Guide - Page 34
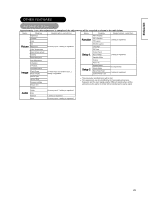
TROUBLESHOOTING continued, Actions to Correct Abnormal Displays RGB Input
 |
View all Hitachi CMP4221U manuals
Add to My Manuals
Save this manual to your list of manuals |
Page 34 highlights
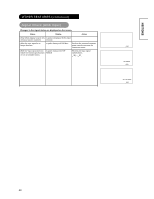
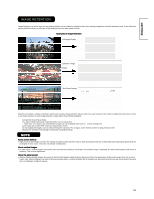
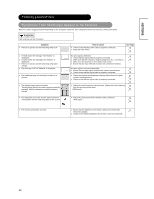
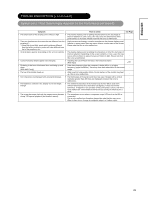
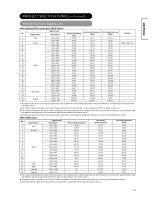
ENGLISH TROUBLESHOOTING (continued) Actions to Correct Abnormal Displays (RGB Input) Corrections d'affichage anormales RVB 1 seulement Depending on the kind of system equipment used, images may not be displayed normally. In this case, make the adjustments suggested below. (only for RGB) Symptom 1 Example Text displayed across the screen appears vertically streaked, with some characters blurred (Figure 1). The display image appears flowing (Figure 2) (RGB input). Figure 1 Vertical Streaks Before adjustment. Some characters are blurred. After adjustment. All characters appear crisp now. After adjustment. All characters are blurred. Adjustment procedure 1) Press the MENU button. The Main Menu will be displayed. 2) Press the OK key and W Xbutton then Select Image. 3) Press the S T SELECT button and select Auto Adjustment. 4) Press the X button to auto configuration. When adjustment is not possible with Auto Adjust: 5) Press the MENU button. The Main Menu will be displayed. 6) Press the OK key and W Xbutton and select Image. 7) Press the S TSELECT button and select Frequency Mode. 8) Press theX or W buttons and search for clear characters over the entire screen. 9) Perform adjustment for symptom 2 below, when the characters are blurred on the entire screen. z The display image may be momentarily disturbed during clock adjustment but this is not a failure. Symptom 2 Example Text displayed across the screen appears blurred in its entirety (Figure 2). A fine pattern flickers when displayed on the screen (Figure 3). Figure 2 Before adjustment Figure 3 Before adjustment Adjustment procedure After adjustment After adjustment 1) Press the MENU button. The Main Menu will be displayed. 2) Press the W Xbutton and Select Image. 3) Press the S TSELECT button and select Auto Adjustment. 4) Press the X button to auto configuration. When adjustment is not possible with Auto Adjust 5) Press the MENU button. The Main Menu will be displayed. 6) Press the OK key andW X button and select Image. 7) Press the S TSELECT button and select Clock PHASE. (Displays fine patterns as characters or a vertical striped pattern over the entire screen during Clock Phase adjustment.) 8) PressX or W buttons to make the text appear clean across the screen. 9) Press Xor W buttons to make the text appear without flickering. 34
-
 1
1 -
2
-
3
-
4
-
5
-
6
-
7
-
8
-
9
-
10
-
11
-
12
-
13
-
14
-
15
-
16
-
17
-
18
-
19
-
20
-
21
-
22
-
23
-
24
-
25
-
26
-
27
-
28
-
 29
29 -
 30
30 -
 31
31 -
 32
32 -
 33
33 -
 34
34 -
 35
35 -
 36
36 -
 37
37 -
 38
38
 |
 |
