Honeywell 7600BP-121-21EE User Guide - Page 30
Side Panel Features
 |
View all Honeywell 7600BP-121-21EE manuals
Add to My Manuals
Save this manual to your list of manuals |
Page 30 highlights
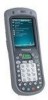
Side Panel Features Side Button Access Door DC Power Jack Headset Jack IrDA Port Side Door Note: This graphic shows the left side of the terminal. Access Door This door covers the memory card slot. To increase memory, install a memory card in this slot. This terminal supports microSD™ and microSDHC™ memory cards. For details, see Installing Memory Cards on page 3-13. When closed, the access door seals the memory interface from moisture and particle intrusion thus preserving the terminal's environmental rating. DC Power Jack The DC power jack receives external power from the power cable that comes in the box with the terminal. When connected to the power cable, the terminal is powered and the main battery pack is charging. For more information, about the power cable, see Connecting the Power Cable on page 3-17. Headset Jack This 2.5mm audio jack supports a headset with a mono speaker and microphone. IrDA Port The IrDA (Infrared Data Association) port communicates with IrDA-enabled devices such as PCs, printers, modems, or other Dolphin terminals. Maximum data transfer speed is 115 Kbps. For more information, see Infrared Communication on page 7-2. Side Button There is a button like this on both side panels. By default, these buttons wake the terminal from suspend mode unless you are in a scanning application, in which case, these buttons activate the image/scan engine. Scanning with the side buttons can be a more comfortable and therefore a more ergonomic alternative to pressing the SCAN key on the keyboard. These buttons can be programmed to launch applications from the Today screen. For more information about programming these buttons, see Customizing a Hardware Button on page 4-5. 3 - 12 Downloaded from www.Manualslib.com manuals search engine Rev A 5/23/2008 Dolphin® 7600 Mobile Computer User's Guide
-
 1
1 -
2
-
3
-
4
-
5
-
6
-
7
-
8
-
9
-
10
-
11
-
12
-
13
-
14
-
15
-
16
-
17
-
18
-
19
-
20
-
21
-
22
-
23
-
24
-
 25
25 -
 26
26 -
 27
27 -
 28
28 -
 29
29 -
 30
30 -
 31
31 -
 32
32 -
 33
33 -
 34
34 -
 35
35 -
36
-
37
-
38
-
39
-
40
-
41
-
42
-
43
-
44
-
45
-
46
-
47
-
48
-
49
-
50
-
51
-
52
-
53
-
54
-
55
-
56
-
57
-
58
-
59
-
60
-
61
-
62
-
63
-
64
-
65
-
66
-
67
-
68
-
69
-
70
-
71
-
72
-
73
-
74
-
75
-
76
-
77
-
78
-
79
-
80
-
81
-
82
-
83
-
84
-
85
-
86
-
87
-
88
-
89
-
90
-
91
-
92
-
93
-
94
-
95
-
96
-
97
-
98
-
99
-
100
-
101
-
102
-
103
-
104
-
105
-
106
-
107
-
108
-
109
-
110
-
111
-
112
-
113
-
114
-
115
-
116
-
117
-
118
-
119
-
120
-
121
-
122
-
123
-
124
-
125
-
126
-
127
-
128
-
129
-
130
-
131
-
132
-
133
-
134
-
135
-
136
-
137
-
138
-
139
-
140
-
141
-
142
 |
 |
