Hoover FH50015 Manual - Page 12
After using tool
 |
View all Hoover FH50015 manuals
Add to My Manuals
Save this manual to your list of manuals |
Page 12 highlights
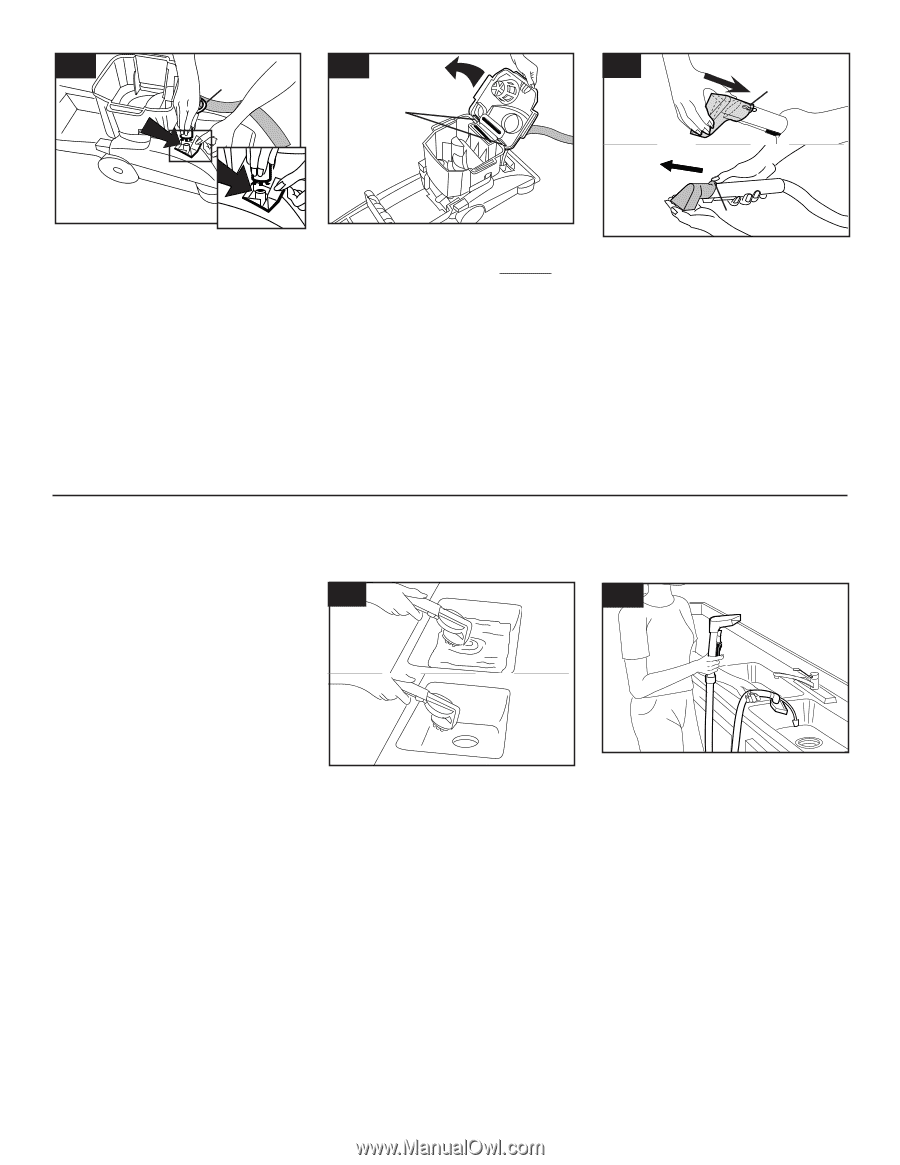
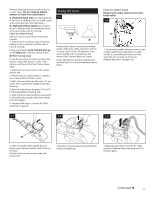
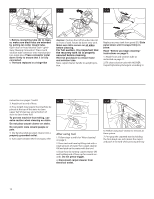
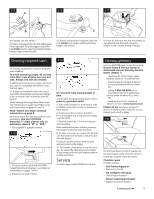
3-10 3-11 3-12 5. Before connecting tube (G) to cleaner, make sure black tabs are extended by pulling tan collar toward tube. Open door on hood labeled "Stair/ upholstery Cleaning Connection". Press round solution tube connector onto round projection inside door. Press connector collar down firmly to ensure that it is fully connected. 6. The tank replaces in a hinge-like manner. Position front of lid under tabs (H) on front of tank. Rotate lid down onto tank. Make sure lid is secure on all sides before cleaning. For full suction, it is important that the recovery tank lid is properly secured before cleaning. Reverse procedure to remove hose and solution tube. Raise carpet cleaner handle to upright posi- tion. J Replace recovery tank front panel (D). Slide panel down until it snaps firmly in place. Read "Before you begin cleaning" instructions on page 9. 1. Attach hose and solution tube as instructed on page 11. 2. Fill clean solution tank with HOOVER Carpet/Upholstery Detergent according to instructions on pages 7 and 8. 3. Attach tool to end of hose. 4. Hose length may require that machine be placed at the top of the stairs to clean upper half of stairway and at bottom of stairs to clean lower half. To prevent machine from falling, use extra caution when cleaning on stairs. Do not place carpet cleaner on stairs. Do not point tools toward people or pets. 5. Dry hands and plug carpet cleaner into a properly grounded outlet. 6. Turn carpet cleaner ON. If necessary, refer 3-13 After using tool 1. Follow steps a and b for "After cleaning" on page 9. 2. Rinse tool and hose by filling sink with a small amount of water. Turn carpet cleaner ON and pick up the water with the tool. 3. Drain hose by turning carpet cleaner ON and holding end of hose up for several seconds. Do not press trigger. 4. Disconnect carpet cleaner from electrical outlet. 3-14 to "Before using tool" section to remove air from system. 7. Pre-spray the carpeted stair by holding the tool about one inch above the carpet and push it forward while pressing the trig- 12
-
 1
1 -
2
-
3
-
4
-
5
-
6
-
 7
7 -
 8
8 -
 9
9 -
 10
10 -
 11
11 -
 12
12 -
 13
13 -
 14
14 -
 15
15 -
 16
16 -
 17
17 -
18
-
19
-
20
-
21
-
22
-
23
-
24
-
25
-
26
-
27
-
28
-
29
-
30
-
31
-
32
-
33
-
34
-
35
-
36
-
37
-
38
-
39
-
40
 |
 |