Hoover FH50015 Manual - Page 5
Upfront tool storage
 |
View all Hoover FH50015 manuals
Add to My Manuals
Save this manual to your list of manuals |
Page 5 highlights
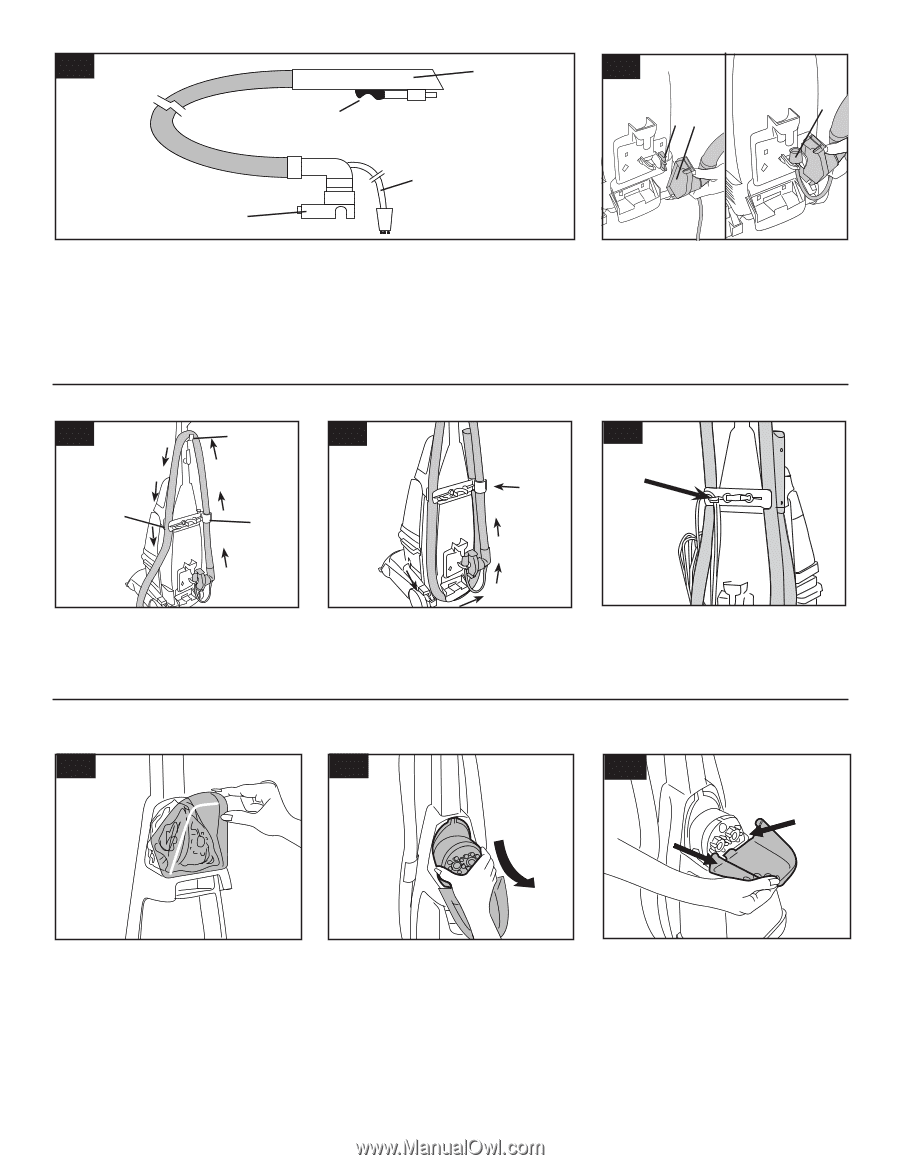
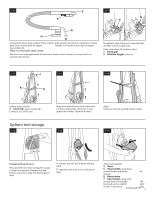
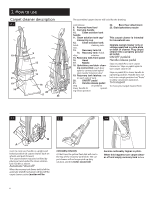
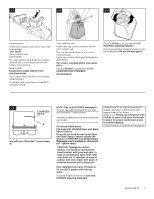
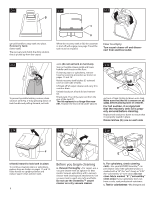
1-10 E 1-11 G F IH G H converter firmly to snap in place. Press solution tube (G) into clip next to converter as shown. Wrap hose around hook on upper handle (J). Press hose into clips on upper hose holder (K). How to reattach tool cover The tool cover is designed with a break-away feature which allows it to snap free if it is pushed open too far. To reattach, align hinges of cover with slots on sides of tool storage area. Push cover down to secure in place. 1. Hand grip 2. Solution trigger: press to 1-12 J 1-13 1-14 K K release clean solution. 3. Cord clip: place cord in clip to keep it out of the way Upfront tool storage 1-15 Wrap hose around lower tool holder and continue until nozzle connector is near upper hose holder. Clip hose in place. driver. Only two nuts are needed on this model. 1-16 1-17 Powered hand tool The powered hand tool is shipped in a plastic bag for protection. Remove the bag before using the tool by first opening tool door. To remove tool (A), pull it down and outward. To reposition the tool, reverse this procedure. when using cleaner 4. Hose 5. Hose holder: wrap hose around holder and hooks for storage. 6. Hose hooks 7. Cord hooks: wrap cord around hooks for storage. The top hook can be rotated right or left for quick and Continued ➔easy 5
-
 1
1 -
 2
2 -
 3
3 -
 4
4 -
 5
5 -
 6
6 -
 7
7 -
 8
8 -
 9
9 -
 10
10 -
 11
11 -
12
-
13
-
14
-
15
-
16
-
17
-
18
-
19
-
20
-
21
-
22
-
23
-
24
-
25
-
26
-
27
-
28
-
29
-
30
-
31
-
32
-
33
-
34
-
35
-
36
-
37
-
38
-
39
-
40
 |
 |