Hoover FH51000 Product Manual - Page 11
Cleaner Assembly, How To Assemble - parts
 |
View all Hoover FH51000 manuals
Add to My Manuals
Save this manual to your list of manuals |
Page 11 highlights
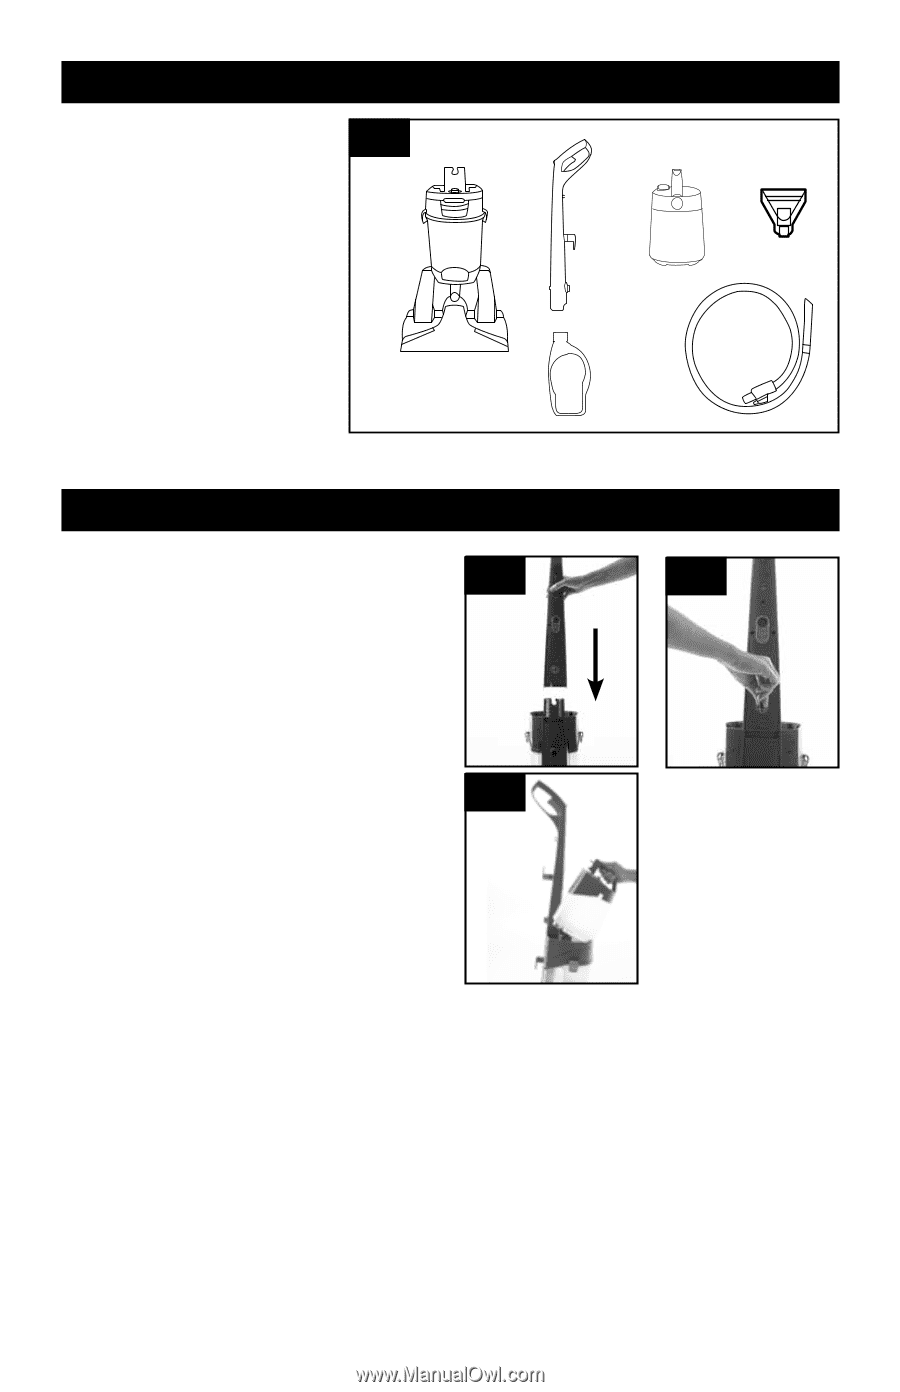
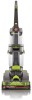
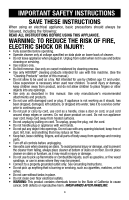
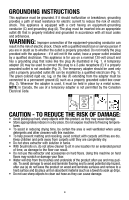
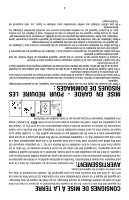
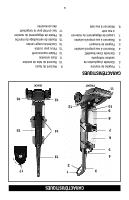
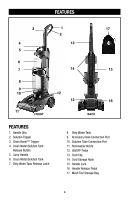
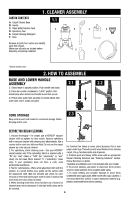
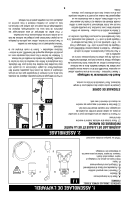
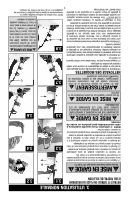
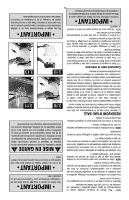
1. Cleaner ASSEMBLY CARTON CONTENTS A. Carpet Cleaner Base B. Handle C. Clean Water/Solution Tank D. Upholstery Tool E. Carpet Cleaning Detergent F. Hose 1.1 A B C D Remove all parts from carton and identify each item shown. Make sure all parts are located before disposing of packing materials. E F *Select models only 2. HOW TO ASSEMBLe Base and Lower Handle Assembly 2.1 2.2 2.1 Stand base in upright position. Push handle onto base. 2.2 Turn dial counter clockwise to "LOCK" postion. Dial should stop when locked and handle should feel secure. 2.3 Place clean water tank securely on handle above dirty water tank until it snaps into place. CORD STORAGE 2.3 Wrap cord around cord hooks for convenient storage. Attach the plug end to cord. Before you begin cleaning 1. Vacuum thoroughly - For carpet, use a HOOVER® vacuum cleaner with an agitator for best results. Vacuum upholstery with a vacuum cleaner with cleaning tool attachments. Use a crevice tool to reach into tufts and folds. Do not use the carpet cleaner as a dry vacuum cleaner. 2. For upholstery, check cleaning code - Use your HOOVER® carpet washer only if the upholstery fabric is marked with a "W" (for "wet" clean) or "S/W" (for "solvent/dry" or "wet" clean). Do not clean fabric marked "S" ("solvent/dry" clean only). If your upholstery does not have a code, seek professional assistance. 3. Test for colorfastness - Wet a white absorbent cloth with the solution. In a small, hidden area, gently rub the surface with the dampened cloth. Wait ten minutes and check for color removal or bleed with white paper towel or cloth. If surface has more than one color, check all colors. 4. When cleaning entire floor, move furniture out of area to be cleaned (may not be necessary if only high traffic areas are to be cleaned). For furniture too heavy to move, place aluminum foil or wax paper under legs. This will prevent wood finishes from staining carpet. Pin up furniture skirts and draperies. 5. Pretreat spots and heavy traffic areas with an appropriate Hoover Cleaning Solutions, see "Cleaning Solutions" section. Follow Directions on bottle. *Available at additional cost if not included with your model. 6. To prevent staining, use plastic or aluminum foil to protect wood or metal surfaces from possible water spray. 7. To avoid wetting and possible damage to wood floors underneath area rugs/carpet, either move area rugs/ carpet to a non-wood hard floor surface or place waterproof material (e.g. plastic) underneath them before cleaning. 6
-
 1
1 -
2
-
3
-
4
-
5
-
 6
6 -
 7
7 -
 8
8 -
 9
9 -
 10
10 -
 11
11 -
 12
12 -
 13
13 -
 14
14 -
 15
15 -
 16
16 -
17
-
18
-
19
-
20
-
21
-
22
-
23
-
24
-
25
-
26
-
27
-
28
-
29
-
30
-
31
-
32
 |
 |