Hotpoint RB525HCT Owners Manual - Page 24
CAUTION, Using the oven., How to Set the Oven for Baking or Roasting
 |
View all Hotpoint RB525HCT manuals
Add to My Manuals
Save this manual to your list of manuals |
Page 24 highlights
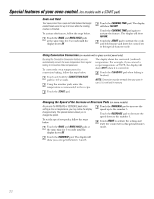
Using the oven. To avoid possible burns, place the shelves in the desired position before you turn the oven on. On models with a door latch, do not lock the oven door with the latch during cooking. The latch is used for self-cleaning only. Depending on your model, the oven will have either 6 (shown) or 5 shelf positions. Before you begin... To avoid possible burns, place the shelves in the desired position before you turn the oven on. The shelves have stops, so that when placed correctly on the supports, they will stop before coming completely out, and will not tilt. When placing and removing cookware, pull the shelf out until it stops. On some models, the bake heating element is under the oven floor. Do not place foods on the oven bottom for cooking. To remove a shelf, pull it toward you, tilt the front end up and pull it out. To replace, place the end of the shelf (stoplocks) on the support, tilt up the front and push the shelf in. CAUTION: When you are using the shelf in the lowest position (A), you will need to use caution when pulling the shelf out. We recommend that you pull the shelf out several inches and then, using two pot holders, pull the shelf out by holding the sides of it. The shelf is low and you could be burned if you place your hand in the middle of the shelf and pull all the way out. Be very careful not to burn your hand on the door when using the shelf in the lowest position (A). How to Set the Oven for Baking or Roasting Touch the BAKE pad. Touch the number pads or the + or - pads (depending on your model) to set the desired temperature. On models with an oven control knob, turn the knob to the temperature you desire. On some models, you must push the knob in before turning. Touch the START pad. To change the oven temperature during BAKE cycle, touch the BAKE pad and then the number pads or + or - pads (depending on your model) to get the new temperature. Turn the knob to OFF when cooking is complete. Check food for doneness at minimum time on recipe. Cook longer if necessary. Touch the CLEAR/OFF pad when cooking is complete. 24
-
 1
1 -
2
-
3
-
4
-
5
-
6
-
7
-
8
-
9
-
10
-
11
-
12
-
13
-
14
-
15
-
16
-
17
-
18
-
 19
19 -
 20
20 -
 21
21 -
 22
22 -
 23
23 -
 24
24 -
 25
25 -
 26
26 -
 27
27 -
 28
28 -
 29
29 -
30
-
31
-
32
-
33
-
34
-
35
-
36
-
37
-
38
-
39
-
40
-
41
-
42
-
43
-
44
-
45
-
46
-
47
-
48
-
49
-
50
-
51
-
52
-
53
-
54
-
55
-
56
-
57
-
58
-
59
-
60
-
61
-
62
-
63
-
64
-
65
-
66
-
67
-
68
-
69
-
70
-
71
-
72
-
73
-
74
-
75
-
76
-
77
-
78
-
79
-
80
-
81
-
82
-
83
-
84
-
85
-
86
-
87
-
88
-
89
-
90
-
91
-
92
-
93
-
94
-
95
-
96
-
97
-
98
-
99
-
100
-
101
-
102
-
103
-
104
-
105
-
106
-
107
-
108
-
109
-
110
-
111
-
112
 |
 |
