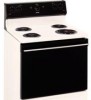
Hotpoint RB525HCT Owners Manual - Page 26
Using the clock and timer., To Turn Off the Clock Display, To Set the Clock, To Set the Timer
 |
View all Hotpoint RB525HCT manuals
Add to My Manuals
Save this manual to your list of manuals |
Page 26 highlights
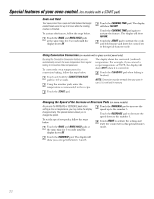
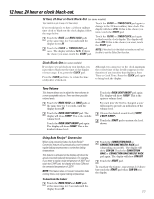
Using the clock and timer. (on some models) Make sure the clock is set to the correct time of day. To Set the Clock The clock must be set to the correct time of day for the automatic oven timing functions to work properly. The time of day cannot be changed during a timed baking or self-cleaning cycle. Touch the CLOCK pad once or twice (depending on your model). On some models, touch and hold the TIMER/CLOCK pad. Depending on your model, touch the number pads or the + or - pads. Touch the START pad. To Turn Off the Clock Display If you have several clocks in your kitchen, you may wish to turn off the time of day clock display on your range. Touch the CLOCK pad once to turn off the time of day display. Although you will not be able to see it, the clock maintains the correct time of day. Touch the CLOCK pad again to recall the clock display. To Set the Timer The timer is a minute timer only. The timer does not control oven operations. Touch the KITCHEN TIMER ON/OFF or TIMER/CLOCK pad (depending on your model). Depending on your model, touch the number pads or the + or - pads until the amount of time you want shows in the display. If you make a mistake touch the KITCHEN TIMER ON/OFF or TIMER/CLOCK pad and begin again. On some models, you will need to touch the START pad. On some models, when the timer reaches :00, the control will beep 3 times followed by one beep every 6 seconds until the KITCHEN TIMER ON/OFF or TIMER/CLOCK pad (depending on your model) is touched. On models with a START pad, the 6 second tone can be canceled by following the steps in the Special features of your oven control section under Tones at the End of a Timed Cycle. To clear the tones on models with a control knob, press the pad of the function you are using. 26
-
 1
1 -
2
-
3
-
4
-
5
-
6
-
7
-
8
-
9
-
10
-
11
-
12
-
13
-
14
-
15
-
16
-
17
-
18
-
19
-
20
-
 21
21 -
 22
22 -
 23
23 -
 24
24 -
 25
25 -
 26
26 -
 27
27 -
 28
28 -
 29
29 -
 30
30 -
 31
31 -
32
-
33
-
34
-
35
-
36
-
37
-
38
-
39
-
40
-
41
-
42
-
43
-
44
-
45
-
46
-
47
-
48
-
49
-
50
-
51
-
52
-
53
-
54
-
55
-
56
-
57
-
58
-
59
-
60
-
61
-
62
-
63
-
64
-
65
-
66
-
67
-
68
-
69
-
70
-
71
-
72
-
73
-
74
-
75
-
76
-
77
-
78
-
79
-
80
-
81
-
82
-
83
-
84
-
85
-
86
-
87
-
88
-
89
-
90
-
91
-
92
-
93
-
94
-
95
-
96
-
97
-
98
-
99
-
100
-
101
-
102
-
103
-
104
-
105
-
106
-
107
-
108
-
109
-
110
-
111
-
112
 |
 |
