IBM FAStT500 User Guide - Page 31
Accessing the controls, Attention
 |
UPC - 087944520320
View all IBM FAStT500 manuals
Add to My Manuals
Save this manual to your list of manuals |
Page 31 highlights
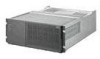
Accessing the controls To access the controllers, battery, controller fan, and indicator lights, you must remove the controller unit bezel, as shown in Figure 6. Attention: Pulling the cover out too far can damage the plastic hooks at the top. To avoid damaging the hooks, place the controller unit on a flat surface. Be sure the front of the controller unit extends beyond the edge approximately 5 cm (2 in.). 1 Carefully pull the bottom of the bezel out to release the pins; then slide the bezel down, as shown in the following figure. Bezel Figure 6. Removing the controller unit bezel 2 To replace the bezel, slip the top edge of the bezel under the lip on the chassis, then push the bottom of the bezel until the pins snap into the mounting holes, as shown in the following figure. Bezel Figure 7. Replacing the controller unit bezel Chapter 2. Operating the controller unit 11
-
 1
1 -
2
-
3
-
4
-
5
-
6
-
7
-
8
-
9
-
10
-
11
-
12
-
13
-
14
-
15
-
16
-
17
-
18
-
19
-
20
-
21
-
22
-
23
-
24
-
25
-
 26
26 -
 27
27 -
 28
28 -
 29
29 -
 30
30 -
 31
31 -
 32
32 -
 33
33 -
 34
34 -
 35
35 -
 36
36 -
37
-
38
-
39
-
40
-
41
-
42
-
43
-
44
-
45
-
46
-
47
-
48
-
49
-
50
-
51
-
52
-
53
-
54
-
55
-
56
-
57
-
58
-
59
-
60
-
61
-
62
-
63
-
64
-
65
-
66
-
67
-
68
-
69
-
70
-
71
-
72
-
73
-
74
-
75
-
76
-
77
-
78
-
79
-
80
-
81
-
82
-
83
-
84
-
85
-
86
-
87
-
88
-
89
-
90
 |
 |
