IBM FAStT500 User Guide - Page 33
Turning off the power
 |
UPC - 087944520320
View all IBM FAStT500 manuals
Add to My Manuals
Save this manual to your list of manuals |
Page 33 highlights
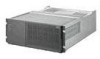
Turning off the power Statememt 5 CAUTION: The power control button on the device and the power supply do not turn off the electrical current supplied to the device. The device also might have more than one power cord. To remove all electrical current from the device, ensure that all power cords are disconnected from the power source. 2 1 Attention: The controller unit is designed to run continuously, 24 hours a day. Except in an emergency, never turn off the power if any controller unit fault indicator lights are lit. Use the proper troubleshooting or servicing procedure to correct the fault before turning off the power. This ensures that the controller unit powers up correctly later. For more information, see "Checking the indicator lights" on page 15. Use the following procedure to turn off power to the controller unit. 1 Prepare the controller unit for shutdown, as follows: a Stop all I/O activity to the controller unit and attached drive enclosures. Logically disconnect the controller and drive enclosures from the hosts. Make sure that the fast write cache indicator light on each controller unit front panel and all applicable drive active indicator lights on each drive enclosure front panel are off (not blinking). Note:If a parity check is in progress, it can take a long time for the drive indicator lights to stop blinking. b Make sure that all amber fault indicator lights on the controller unit are off. If any fault indicator lights are on, correct the problem before turning off the power. For more information, see "Checking the indicator lights" on page 15. 2 Turn off the power switches on the back of the controller unit (see Figure 8 on page 12). 3 Turn off any drive enclosures attached to the controller unit. Chapter 2. Operating the controller unit 13
-
 1
1 -
2
-
3
-
4
-
5
-
6
-
7
-
8
-
9
-
10
-
11
-
12
-
13
-
14
-
15
-
16
-
17
-
18
-
19
-
20
-
21
-
22
-
23
-
24
-
25
-
26
-
27
-
 28
28 -
 29
29 -
 30
30 -
 31
31 -
 32
32 -
 33
33 -
 34
34 -
 35
35 -
 36
36 -
 37
37 -
 38
38 -
39
-
40
-
41
-
42
-
43
-
44
-
45
-
46
-
47
-
48
-
49
-
50
-
51
-
52
-
53
-
54
-
55
-
56
-
57
-
58
-
59
-
60
-
61
-
62
-
63
-
64
-
65
-
66
-
67
-
68
-
69
-
70
-
71
-
72
-
73
-
74
-
75
-
76
-
77
-
78
-
79
-
80
-
81
-
82
-
83
-
84
-
85
-
86
-
87
-
88
-
89
-
90
 |
 |
