IC Realtime ICIP-B3732Z Product Manual - Page 18
Scan, 2 Preset
 |
View all IC Realtime ICIP-B3732Z manuals
Add to My Manuals
Save this manual to your list of manuals |
Page 18 highlights
PTZ setting interface is shown as in Figure 3- 2. Here you can set scan, preset, tour, pattern, assistant function and light and wiper plus view coordinate. Figure 3- 2 3.1 Scan Scan interface is shown in Figure 3- 3. Steps to scan are: Figure 3- 3 Step 1. Click on Set button, display icon. Step 2. Move via direction key to select left, click on Set Left to set left border of camera Step 3. Move via direction key to select right, click on Set Right to set right border of camera. Step 4. Complete scan path setup. 3.2 Preset Preset interface is shown in Figure 3- 4. 14
-
 1
1 -
2
-
3
-
4
-
5
-
6
-
7
-
8
-
9
-
10
-
11
-
12
-
 13
13 -
 14
14 -
 15
15 -
 16
16 -
 17
17 -
 18
18 -
 19
19 -
 20
20 -
 21
21 -
 22
22 -
 23
23 -
24
-
25
-
26
-
27
-
28
-
29
-
30
-
31
-
32
-
33
-
34
-
35
-
36
-
37
-
38
-
39
-
40
-
41
-
42
-
43
-
44
-
45
-
46
-
47
-
48
-
49
-
50
-
51
-
52
-
53
-
54
-
55
-
56
-
57
-
58
-
59
-
60
-
61
-
62
-
63
-
64
-
65
-
66
-
67
-
68
-
69
-
70
-
71
-
72
-
73
-
74
-
75
-
76
-
77
-
78
-
79
-
80
-
81
-
82
-
83
-
84
-
85
-
86
-
87
-
88
-
89
-
90
-
91
-
92
-
93
-
94
 |
 |

14
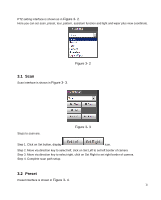
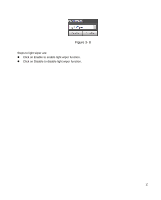
PTZ setting interface is shown as in
Figure 3- 2
.
Here you can set scan, preset, tour, pattern, assistant function and light and wiper plus view coordinate.
Figure 3- 2
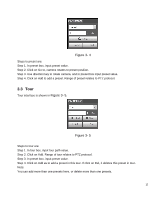
3.1 Scan
Scan interface is shown in
Figure 3- 3
.
Figure 3- 3
Steps to scan are:
Step 1. Click on Set button, display
icon.
Step 2. Move via direction key to select left, click on Set Left to set left border of camera
Step 3. Move via direction key to select right, click on Set Right to set right border of camera.
Step 4. Complete scan path setup.
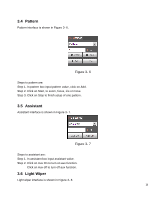
3.2 Preset
Preset interface is shown in
Figure 3- 4
.