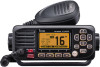
Icom IC-M220 Instruction Manual - Page 23
Setting Favorite channels, Starting a scan, Channel Group, Example
 |
View all Icom IC-M220 manuals
Add to My Manuals
Save this manual to your list of manuals |
Page 23 highlights
SCAN OPERATION 5 ■■ Setting Favorite channels You can quickly recall often-used channels by setting them as Favorite channels. You can set Favorite channels in each Channel Group. 1 1. Select a Channel Group on the Menu screen. (p. 7) 2 [MENU] > Radio Settings > Channel Group 3 2. Push [▲] or [▼] to select the channel. 3. Push [◄] or [►] to display . 4 4. Push . ••The selected channel is set as a Favorite channel, and " " is displayed. 5 LL To cancel the setting, push again. TIP: You can set all channels as Favorite channels, clear all settings, or reset to the 6 defaults. By default, some channels are preset as Favorite channels. The preset channels differ, depending on the transceiver version. 7 8 ■■ Starting a scan 9 Example: Starting a Normal Scan. 10 1. Select a Channel Group on the Menu screen. (p. 7) [MENU] > Radio Settings > Channel Group 11 2. Push [◄] or [►] to display SCAN . 12 3. Push SCAN . ••The scan starts. 13 •• " " is displayed during a Normal Scan, and " " is displayed during a Priority Scan. 14 •• " " and " " are displayed when a signal is received. 15 LL When a signal is received, the scan pauses until it disappears, or resumes after 5 seconds, depending on the Scan Timer setting in "Radio Settings." 16 LL A beep sounds and "16" blinks when a signal is received on Channel 16 during a Priority scan. 17 4. To stop the scan, push SCAN . 18 TIP: To properly receive signals, be sure to adjust the squelch to a suitable level. 13
-
 1
1 -
2
-
3
-
4
-
5
-
6
-
7
-
8
-
9
-
10
-
11
-
12
-
13
-
14
-
15
-
16
-
17
-
 18
18 -
 19
19 -
 20
20 -
 21
21 -
 22
22 -
 23
23 -
 24
24 -
 25
25 -
 26
26 -
 27
27 -
 28
28 -
29
-
30
-
31
-
32
-
33
-
34
-
35
-
36
-
37
-
38
-
39
-
40
-
41
-
42
-
43
-
44
-
45
-
46
-
47
-
48
-
49
-
50
-
51
-
52
-
53
-
54
-
55
-
56
-
57
-
58
-
59
-
60
-
61
-
62
-
63
-
64
-
65
-
66
 |
 |
