JVC GZ-EX210 User Manual - English - Page 171
Scene Select, Focus, Brightness Adjust, White Balance, Backlight Comp., Tele Macro, Touch Priority
 |
View all JVC GZ-EX210 manuals
Add to My Manuals
Save this manual to your list of manuals |
Page 171 highlights
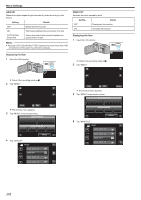
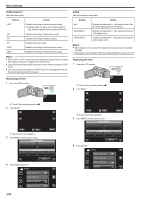
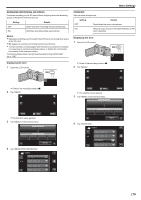
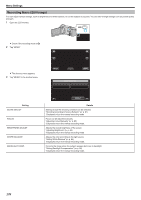
Menu Settings SCENE SELECT Settings to suit the shooting condition can be selected. Operating Details "Shooting According to Scene (Subject)" (A p. 81) FOCUS Focus can be adjusted manually. Operating Details "Adjusting Focus Manually" (A p. 83) BRIGHTNESS ADJUST Adjusts the overall brightness of the screen. Operating Details "Adjusting Brightness" (A p. 84) WHITE BALANCE Adjusts the color according to the light source. Operating Details "Setting White Balance" (A p. 85) BACKLIGHT COMP. Corrects the image when the subject appears dark due to backlight. Operating Details "Setting Backlight Compensation" (A p. 86) TELE MACRO Enables close-up shots when using the telephoto (T) end of the zoom. Operating Details "Taking Close-up Shots" (A p. 87) TOUCH PRIORITY AE/AF Automatically adjusts focus and brightness based on the subjects' faces or selected area. Operating Details "Capturing Subjects Clearly (TOUCH PRIORITY AE/AF)" (A p. 93) LIGHT (GZ-EX215) Turns on/off the light. Setting Details OFF Does not light up. AUTO Lights up automatically when the surrounding is dark. ON Lights up at all times. Displaying the Item 1 Open the LCD monitor. . 0 Check if the recording mode is A. 2 Tap "MENU". ˻PLAY REC . 0 The shortcut menu appears. 3 Tap "MENU" in the shortcut menu. MENU . 4 Tap "LIGHT". VIDEO MENU LIGHT . 171
-
 1
1 -
2
-
3
-
4
-
5
-
6
-
7
-
8
-
9
-
10
-
11
-
12
-
13
-
14
-
15
-
16
-
17
-
18
-
19
-
20
-
21
-
22
-
23
-
24
-
25
-
26
-
27
-
28
-
29
-
30
-
31
-
32
-
33
-
34
-
35
-
36
-
37
-
38
-
39
-
40
-
41
-
42
-
43
-
44
-
45
-
46
-
47
-
48
-
49
-
50
-
51
-
52
-
53
-
54
-
55
-
56
-
57
-
58
-
59
-
60
-
61
-
62
-
63
-
64
-
65
-
66
-
67
-
68
-
69
-
70
-
71
-
72
-
73
-
74
-
75
-
76
-
77
-
78
-
79
-
80
-
81
-
82
-
83
-
84
-
85
-
86
-
87
-
88
-
89
-
90
-
91
-
92
-
93
-
94
-
95
-
96
-
97
-
98
-
99
-
100
-
101
-
102
-
103
-
104
-
105
-
106
-
107
-
108
-
109
-
110
-
111
-
112
-
113
-
114
-
115
-
116
-
117
-
118
-
119
-
120
-
121
-
122
-
123
-
124
-
125
-
126
-
127
-
128
-
129
-
130
-
131
-
132
-
133
-
134
-
135
-
136
-
137
-
138
-
139
-
140
-
141
-
142
-
143
-
144
-
145
-
146
-
147
-
148
-
149
-
150
-
151
-
152
-
153
-
154
-
155
-
156
-
157
-
158
-
159
-
160
-
161
-
162
-
163
-
164
-
165
-
 166
166 -
 167
167 -
 168
168 -
 169
169 -
 170
170 -
 171
171 -
 172
172 -
 173
173 -
 174
174 -
 175
175 -
 176
176 -
177
-
178
-
179
-
180
-
181
-
182
-
183
-
184
-
185
-
186
-
187
-
188
-
189
-
190
-
191
-
192
-
193
-
194
-
195
-
196
-
197
-
198
-
199
-
200
-
201
-
202
-
203
-
204
-
205
-
206
-
207
-
208
-
209
-
210
-
211
-
212
-
213
-
214
-
215
 |
 |
