Kenmore 1776 Use and Care Guide - Page 8
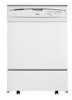
Connecting The Dishwasher - portable dishwasher
 |
View all Kenmore 1776 manuals
Add to My Manuals
Save this manual to your list of manuals |
Page 8 highlights
CONNECTING THE DISHWASHER NOTE: A special adapter must be installed on the faucet before the dishwasher can be connected. Complete Installation Instructions and the adapter are packed with your dishwasher. (See the Installation Instructions.) When moving your dishwasher, make sure the door is latched. Hold the dishwasher at the top front corners. Preparing the faucet 1. Remove the screen holder or aerator, screen, and washer from the end of the faucet. 2. Use the faucet adapter kit that came with your portable dishwasher to modify the faucet where the dishwasher will be used. NOTE: Remove and save the washer, screen, and screen holder or aerator for future use. Connecting the faucet adapter to faucets with internal threads Insert the 2 screens, the thin washer, and then the thick washer from the faucet adapter kit into the faucet adapter. Attach the adapter onto the end of the faucet. NOTE: Use both washers. B fo A. Thick washer B. Thin washer C. Screens D. Faucet adapter B A. Washer B. Screen C. Screen holder or aerator Connecting the faucet adapter to faucets with external threads Insert the 2 screens and then the thin washer from the faucet adapter kit into the faucet adapter. Attach the adapter onto the end of the faucet. NOTE: Do not use the thick washer. 1. Run water at the faucet until it is hot. Turn off the water. 2. Pull the hoses out of their storage compartment on the back of the dishwasher. NOTE: Make sure the hoses are not kinked or twisted. Kinked hoses reduce washing performance. 3= Pull down on the locking collar while lifting the hose connector onto the faucet adapter. A ...........O... B C A. Thin washer B. Screens C. Faucet adapter A. Faucet adapter B. Locking collar C. Hose connector 4. When the connector snaps into place, release the locking collar. 5. Turn the hot water on slowly until it is all the way on. 6. Plug into a grounded 3 prong outlet.
-
 1
1 -
2
-
 3
3 -
 4
4 -
 5
5 -
 6
6 -
 7
7 -
 8
8 -
 9
9 -
 10
10 -
 11
11 -
 12
12 -
 13
13 -
14
-
15
-
16
-
17
-
18
-
19
-
20
-
21
-
22
-
23
-
24
-
25
-
26
-
27
-
28
-
29
-
30
-
31
-
32
-
33
-
34
-
35
-
36
-
37
-
38
-
39
-
40
-
41
-
42
-
43
-
44
-
45
-
46
-
47
-
48
-
49
-
50
-
51
-
52
-
53
-
54
-
55
-
56
-
57
-
58
-
59
-
60
 |
 |
