Kenmore 75062 Owners Manual - Page 11
Direction, Adjustment
 |
View all Kenmore 75062 manuals
Add to My Manuals
Save this manual to your list of manuals |
Page 11 highlights
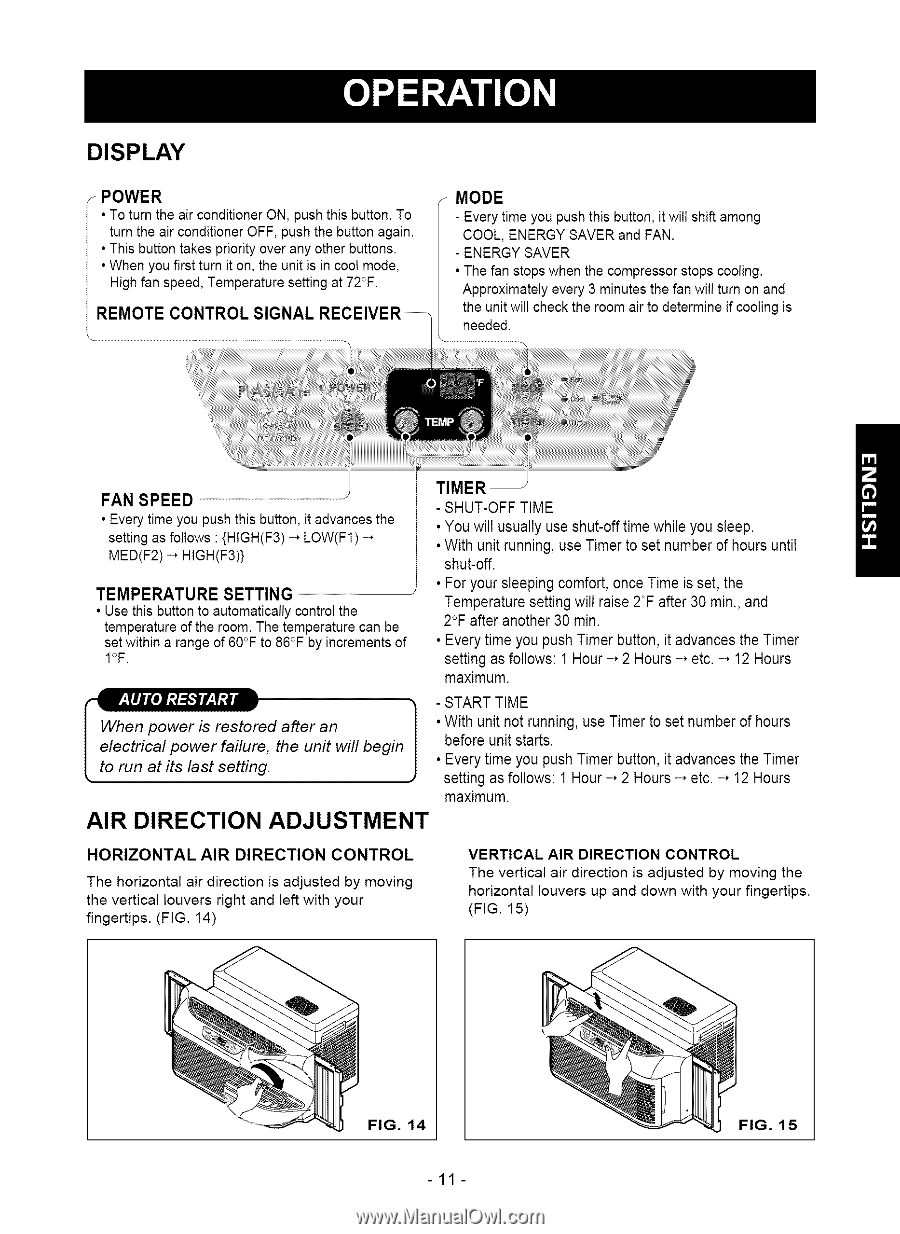
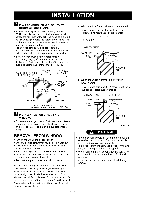
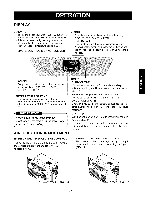
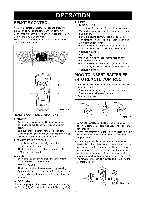
DISPLAY POWER • To turn the air conditioner ON, push this button. To turn the air conditioner OFF, push the button again. • This button takes priority over any other buttons. • When you first turn it on, the unit is in cool mode, High fan speed, Temperature setting at 72'_F. _REMQTECO EIVER_ MODE - Every time you push this button, it will shift among COOL, ENERGY SAVER and FAN. - ENERGY SAVER • The fan stops when the compressor stops cooling. Approximately every 3 minutes the fan will turn on and the unit will check the room air to determine if cooling is needed. FAN SPEED • Every time you push this button, it advances the setting as follows : {HIGH(F3) -* LOW(F1) -* MED(F2)-* HIGH(F3)} TIMER - SHUT-OFF TIME • You will usually use shut-off time while you sleep. • With unit running,use Timer to set number of hours until shut-off. TEMPERATURE SETTING T.F.oe..rm..y.pouerrastluereepseintgtincogmwilflorrat,isoence2FTimafeter is set, the 30 min.,and • Use this button to automatically controt the 2°F after another 30 min. temperature of the room. The temperature can be set within a range of 60_'F to 86°F by increments of • Everytime you pushTimer button, it advances the Timer I°F. setting as follows: 1 Hour-, 2 Hours-* etc. -* 12 Hours maximum. 1 - START TIME When power is restored after an electrical power failure, the unit will begin to run at its last setting. JI • With unit not running, use Timer to set number before unit starts. • Every time you push Timer button, it advances of hours the Timer settingas follows: 1 Hour-* 2 Hours -* etc. -* 12 Hours maximum. AIR DIRECTION ADJUSTMENT HORIZONTAL AIR DIRECTION CONTROL The horizontal air direction is adjusted by moving the vertical louvers right and left with your fingertips. (FIG. 14) VERTICAL AIR DIRECTION CONTROL The vertical air direction is adjusted by moving the horizontal louvers up and down with your fingertips. (FIG. 15) FIG. 14 -11- FIG. 15
-
 1
1 -
2
-
3
-
4
-
5
-
 6
6 -
 7
7 -
 8
8 -
 9
9 -
 10
10 -
 11
11 -
 12
12 -
 13
13 -
 14
14 -
 15
15 -
 16
16 -
17
-
18
-
19
-
20
-
21
-
22
-
23
-
24
-
25
-
26
-
27
-
28
-
29
-
30
-
31
-
32
 |
 |