Kenmore 75062 Owners Manual - Page 12
Control, How To Insert, Batteries, Into Remote - air conditioner dimensions
 |
View all Kenmore 75062 manuals
Add to My Manuals
Save this manual to your list of manuals |
Page 12 highlights
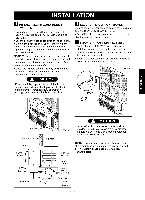
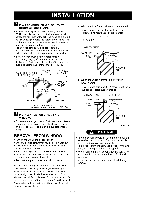
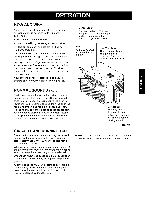
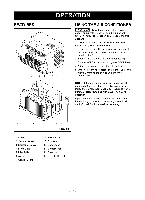
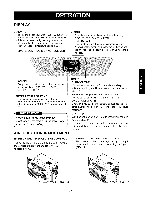
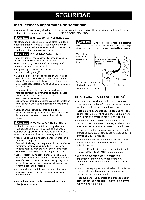
REMOTE CONTROL Note: The Remote Control wilI not operate properly if strong light shines on the sensor window of the Air Conditioner or if there are obstacles between the Remote Control and the Air Conditioner. Every time you push button, you wilI hear beep sound from the Air Conditioner. 1 6 3 4 2 5 5 5. TIMER - SHUT-OFF TIME • You will usually use shut-off time while you sleep. • With unit running, use Timer to set number of hours until shut-off. • For your sleeping comfort, once Time is set, the Temperature setting will raise 2°F after 30 min, and 2°F after another 30 min. • Every time you push Timer button, it advances the Timer setting as follows: 1 Hour -* 2 Hours -* etc. -* 12 Hours maximum. - START TIME • With unit not running, use timer to set number of hours before unit starts. • Every time you push Timer button, it advances the Timer setting as follows: 1 Hour -* 2 Hours -* etc. -* 12 Hours maximum. HOW TO INSERT BATTERIES INTO REMOTE CONTROL 1. Remove the cover from the back of the remote controller. 2. Insert two batteries. • Be sure that the (+) and (-) directions are correct. • Be sure that both batteries are new. 3. Re-attach the cover. FIG. 16 REMOTE CONTROL OPERATIONS 17 1. POWER • To turn the air conditioner ON, push this button. To turn the air conditioner OFF, push the button again. • This button takes priority over any other button. • When you first turn it on, the unit is in cooi mode, High fan speed, Temperature setting at 72°F. 2. TEMPERATURE SETTING • Use this button to automatically control the temperature of the room. The temperature can be set within a range of 60°F to 86°F by increments of 1 °F. 3. MODE - Every time you push this button, it will shift among COOL, ENERGY SAVER and FAN. • Do not use rechargeable batteries. Such batteries differ from standard dry cells in shape, dimensions, and performance. • Remove the batteries from the remote controller if the air conditioner is not going to be used for an extended length of time. • In order to prevent discharge, remove the batteries from the remote control if the air conditioner is not going to be used for an extended period of time. Keep the remote control away from extremely hot or humid places. To maintain optimal operation of the remote control, the remote sensor should not be exposed to direct sunlight. • The remote control can be mounted on a wall using the mountabie holder. - ENERGY SAVER • The fan stops when the compressor stops cooling. Approximately every 3 minutes the fan wilI turn on and the unit will check the room air to determine if cooling is needed. 4. FAN SPEED • Every time you push this button, it advances the setting as follows: {High(F3) -+ Low(F1) -, Med(F2) -, High(F3)} FIG. 18 -12-
-
 1
1 -
2
-
3
-
4
-
5
-
6
-
 7
7 -
 8
8 -
 9
9 -
 10
10 -
 11
11 -
 12
12 -
 13
13 -
 14
14 -
 15
15 -
 16
16 -
 17
17 -
18
-
19
-
20
-
21
-
22
-
23
-
24
-
25
-
26
-
27
-
28
-
29
-
30
-
31
-
32
 |
 |
